
Choosing the correct miter saw dust collection port size is important when connecting a shop vacuum or dust extractor to your saw. Unfortunately, miter saw dust ports and vacuum hoses do not all use the same dimensions. An adapter that looks close may fit loosely, restrict airflow, or fail to stay connected while the saw moves. The best approach is to measure both connection points, identify the type of fitting you need, and check compatibility with your exact saw model.
This guide explains how to measure a miter saw dust port, match it with a vacuum hose, choose the right adapter, and troubleshoot common connection problems. It also covers quick-connect fittings and brand-specific compatibility considerations.
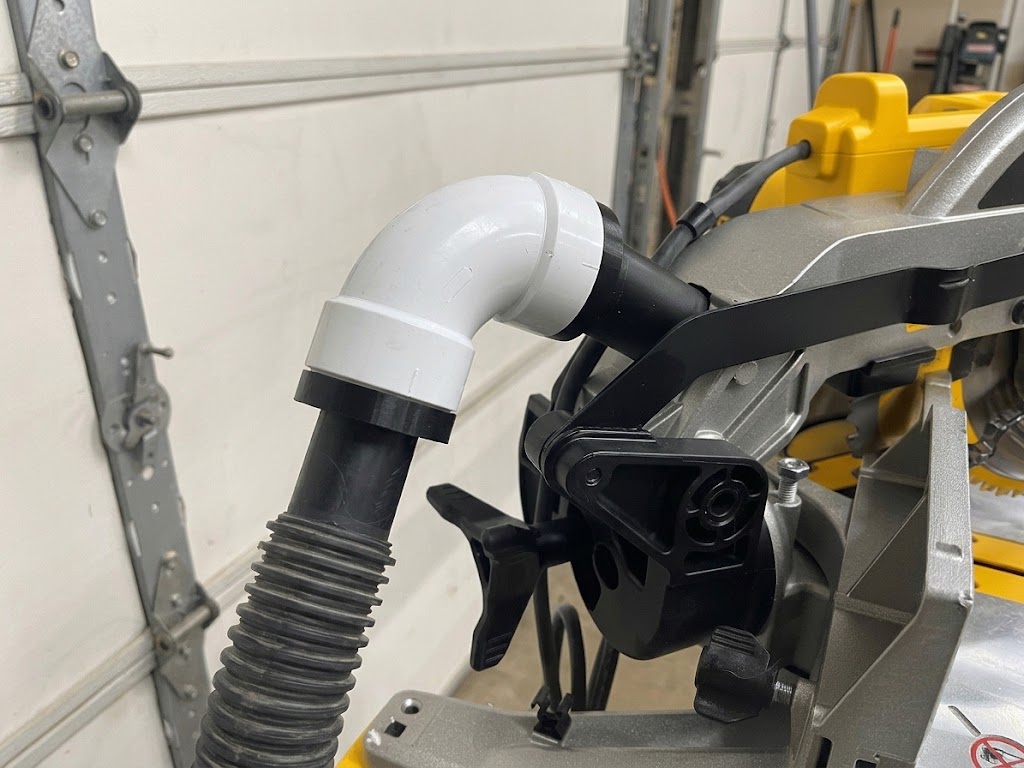
Why Miter Saw Dust Collection Port Size Matters
A miter saw produces wood chips and fine sawdust around the blade and cutting area. Most models include a dust port, chute, or collection outlet that can connect to a dust bag, shop vacuum, or dust extractor.
However, the connection is not always straightforward.
The dust port on one saw may have a different diameter or shape from the port on another model. Vacuum hoses also come in different sizes, and their connection ends may be designed to fit inside or over a tool port.
For example, a hose labeled 1-1/4 inches does not necessarily fit every tool port with a similar-looking measurement. The actual inside and outside diameters matter.
A suitable adapter helps bridge this difference.
A properly matched connection should:
- Fit securely without excessive looseness.
- Avoid unnecessary restrictions in the airflow path.
- Remain attached during normal saw operation.
- Allow the saw to move through its full cutting range.
- Avoid interfering with the blade guard, sliding rails, or workpiece.
Important: A well-fitted adapter does not guarantee that all sawdust will be captured. Miter saws can throw debris beyond the factory collection opening. The adapter is only one part of the complete dust collection setup.
How to Measure a Miter Saw Dust Collection Port
Before buying an adapter, measure the dust port on your own saw. Do not rely only on the brand name or a measurement reported for another model.
Two saws from the same manufacturer may have different dust collection arrangements.
Step 1: Disconnect the Saw From Power
Before measuring or inspecting the dust port:
- Turn off the saw.
- Unplug the power cord or remove the battery.
- Wait until the blade has completely stopped.
- Make sure the saw cannot start accidentally.
- Inspect the dust port and remove loose debris if necessary.
Never put your hands near the blade or internal moving parts while the saw is connected to power.
Step 2: Identify the Shape of the Dust Port
Look at the outlet where the dust bag or vacuum hose connects.
A miter saw dust port may be:
- Round.
- Oval.
- Rectangular.
- Tapered.
- Stepped, with more than one diameter.
- Part of a removable dust chute or elbow.
The shape matters because a round adapter may not seal correctly against an oval or irregular opening.
If the port is oval, measure both its widest and narrowest dimensions. Record the measurements rather than treating it as a standard round opening.
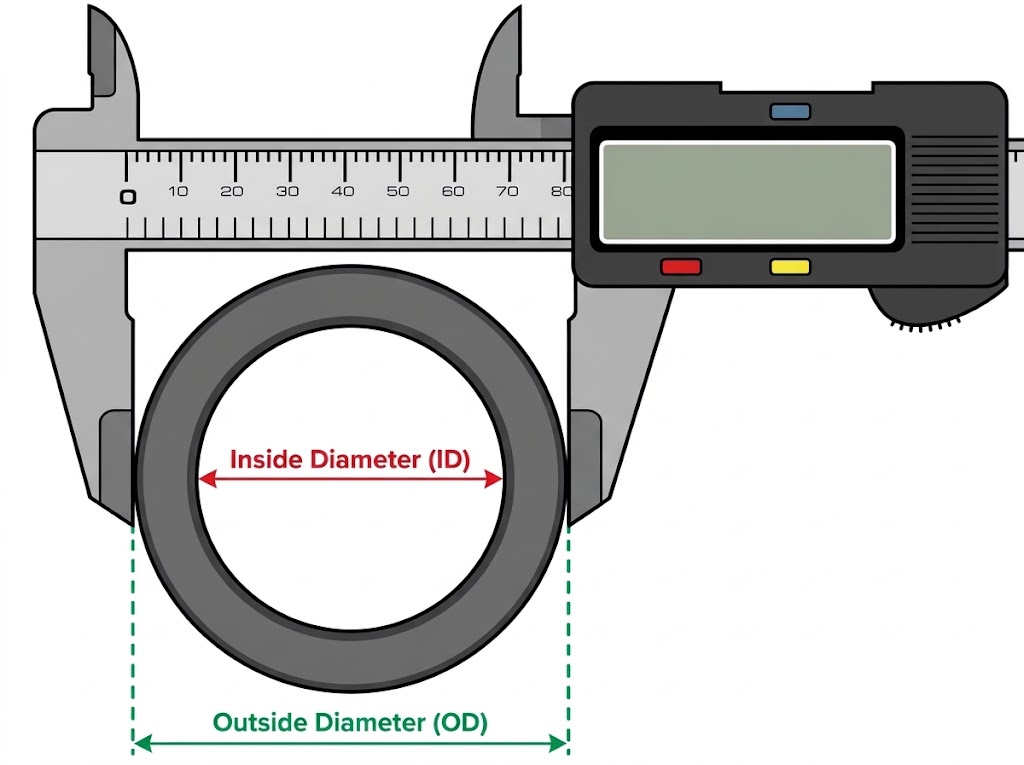
Step 3: Measure the Outside Diameter
If the dust port has a round male connection that a hose or adapter slides over, measure its outside diameter (OD).
Use a digital caliper if possible.
- Open the caliper jaws.
- Position them around the widest part of the port.
- Close the jaws gently until they touch the outside surface.
- Record the measurement in inches or millimeters.
If the port is tapered, measure near the opening and at another point farther back. This helps identify whether the adapter needs a tapered or stepped connection.
Step 4: Measure the Inside Diameter
Some hoses and adapters fit inside a dust port instead of sliding over it.
In that situation, measure the inside diameter (ID).
Place the internal measuring jaws of the caliper inside the opening and record the diameter. Do not force the caliper or damage a plastic port.
Both measurements can be useful because a port may accept a hose from either direction.
Step 5: Measure the Vacuum Hose Connection
Next, measure the end of the hose you want to connect.
Do not assume that the hose’s advertised diameter is the exact diameter of its connector. Some hoses have tapered cuffs, stepped ends, or locking fittings.
Record:
- Hose inside diameter.
- Hose outside diameter, if relevant.
- Whether the connector is tapered or straight.
- Whether it has a locking or twist connection.
You should now have enough information to compare the two connection points.
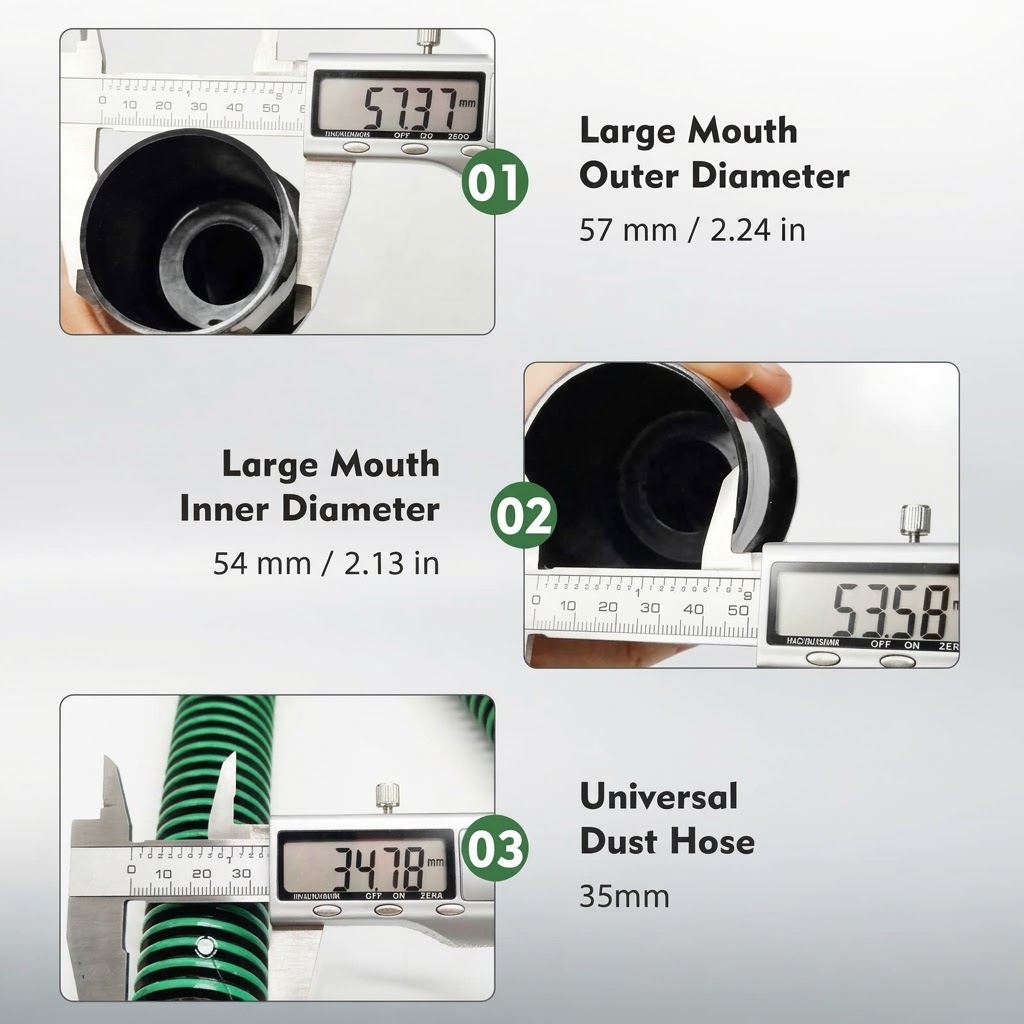
How to Measure a Miter Saw Dust Collection Hose
The next step is to identify the size and shape of your vacuum hose connection.
Shop vacuum hoses commonly use nominal sizes such as 1-1/4 inches, 1-7/8 inches, and 2-1/2 inches. However, these labels do not always describe the exact dimensions of the connector that touches the saw.
A hose may have a cuff that fits over a port, a nozzle that fits inside it, or a stepped end designed to accommodate different connections.
What to Check Before Choosing an Adapter
| Measurement or feature | What to check |
|---|---|
| Hose diameter | Confirm the actual connection dimensions |
| Connector type | Inside-fit, outside-fit, tapered, or locking |
| Hose shape | Round, oval, or another profile |
| Hose flexibility | Check whether it can move with the saw |
| Connection security | Make sure the fitting stays attached |
If possible, take the hose and adapter to the workshop and test the connection before making a purchase.
A snug connection is preferable to one that falls off easily. However, avoid forcing an oversized fitting onto a plastic dust port because it may crack or deform.
For more guidance on connecting a shop vacuum, selecting hoses, and setting up a small-workshop dust collection system, read our guide to dust collection systems with a shop vac
Types of Miter Saw Dust Collection Adapters
Once you know the dimensions of both connections, you can identify the adapter type you need.
Not every adapter performs the same job. Some change the diameter, some connect different fitting styles, and others replace or extend the saw’s original dust chute.
1. Reducer Adapters
A reducer adapter connects two openings with different diameters.
For example, you may need to connect a smaller saw port to a larger vacuum hose. A reducer provides a transition between those sizes.
Look for a fitting with a gradual transition where possible. A sudden, narrow restriction can reduce the effective airflow through the connection.
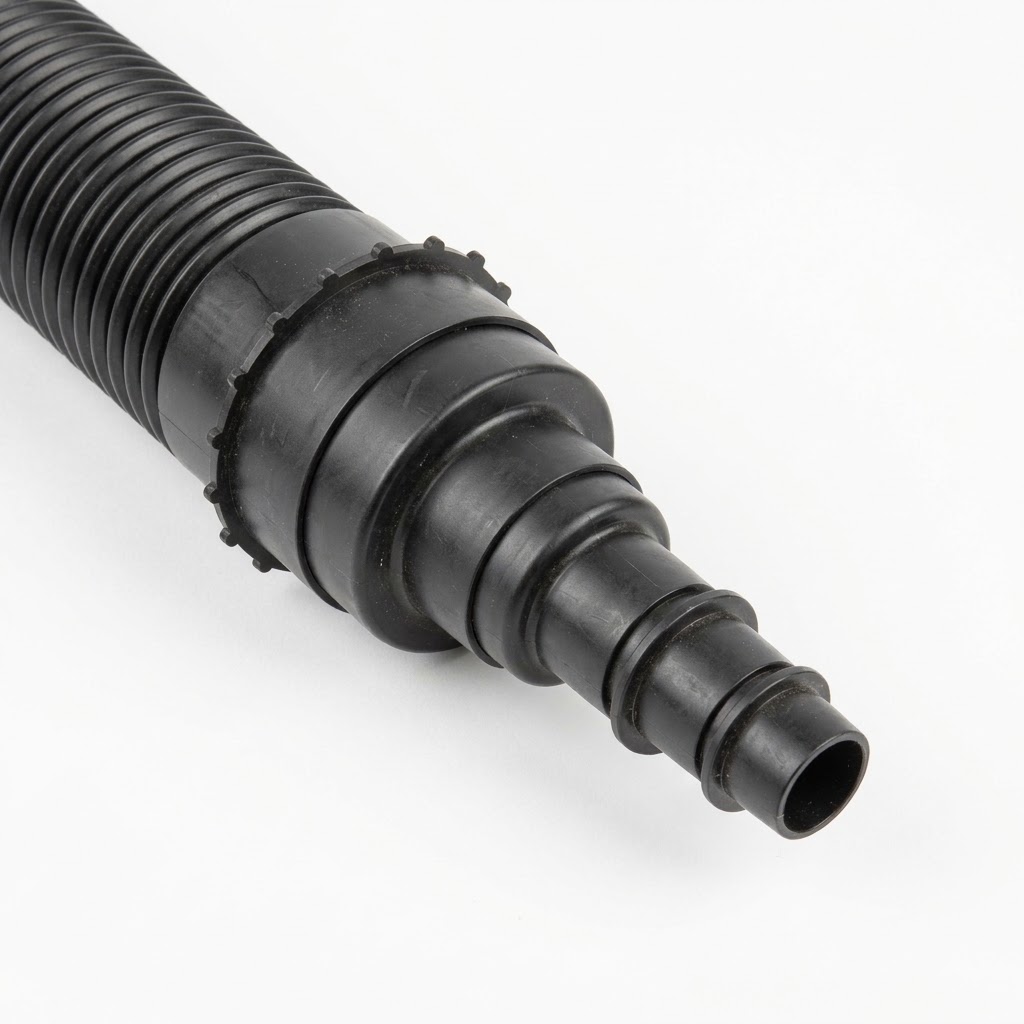
2. Stepped Adapters
A stepped adapter has multiple connection diameters along its body.
This design can be useful when a hose cuff or tool port has an unusual size. You can select the step that gives the closest fit.
However, check the actual dimensions rather than assuming every step will fit your saw.
3. Rubber Couplings
Rubber couplings can help connect two fittings that are close in size but do not seal properly.
Depending on the design, a coupling may provide:
- A flexible connection.
- A tighter fit around slightly different diameters.
- Easier removal for cleaning or storage.
Do not use a coupling that is so tight that it deforms the saw’s dust port. Also, make sure it cannot slide loose during operation.
4. Custom Adapters
Some saws have unusual or model-specific dust outlets. A standard adapter may not fit.
In that case, a custom adapter may be an option. It could be made from a suitable hose fitting, a shop-made connector, or a properly designed 3D-printed part.
Any custom fitting should:
- Match the measured dimensions.
- Have a secure connection at both ends.
- Avoid sharp internal steps or unnecessary restrictions.
- Use material suitable for the workshop environment.
- Stay clear of the saw’s moving components.
Do not assume that a homemade fitting is safe simply because it fits.
How to Choose the Right Miter Saw Dust Collection Adapter
After measuring both connection points, use the following process to select an adapter.
1. Match the Actual Measurements
Compare the saw port measurements with the adapter’s listed dimensions.
Check whether the adapter fits:
- Over the outside of the port.
- Inside the port.
- Over the hose cuff.
- Inside the hose cuff.
This distinction is important. Two parts with the same nominal diameter may not connect if both are designed to fit over each other or both are designed to fit inside each other.
2. Check the Adapter’s Shape
A round adapter may not work correctly with an oval dust outlet.
If your saw has an unusual port shape, look for a model-compatible fitting or an adapter designed specifically for that shape.
Do not force a round fitting into an opening that it does not match.
3. Avoid Unnecessary Airflow Restrictions
A dust collection adapter should not create an unnecessarily narrow passage.
A fitting with a very small opening, abrupt internal steps, or a sharp bend may restrict airflow.
Choose a smooth transition that maintains the largest practical internal opening compatible with the saw and hose.
4. Consider Hose Movement
A miter saw may have a sliding head, bevel adjustment, and miter adjustment.
The hose and adapter must not interfere with these movements.
Before reconnecting power:
- Check the connection with the saw unplugged.
- Move the saw through its permitted miter and bevel positions.
- Check the sliding movement where applicable.
- Confirm that the hose does not pull on the plastic dust port.
- Make sure the hose cannot enter the blade path.
A hose support can help prevent the hose’s weight from pulling on the adapter.
5. Confirm Model Compatibility
If you are purchasing a brand-specific adapter, check the exact saw model and the manufacturer’s compatibility information.
A product described as a DeWalt, Bosch, Makita, or Ryobi adapter is not automatically compatible with every saw made by that brand.
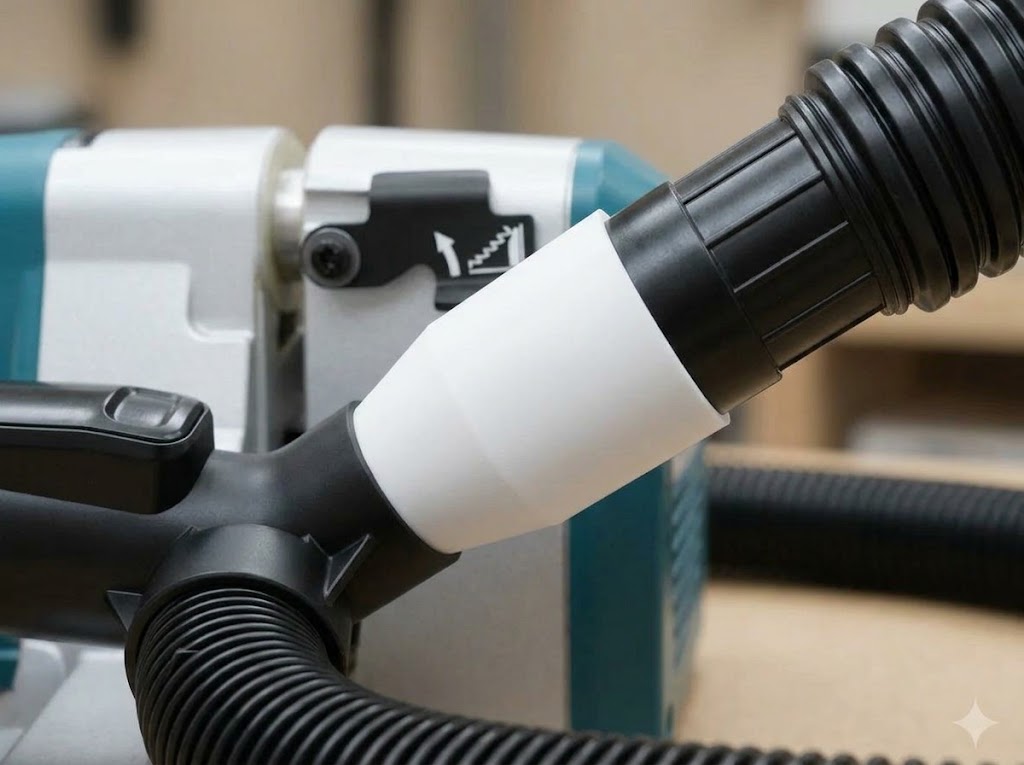
If connecting a hose doesn’t capture enough airborne sawdust, adding a rear collection hood can provide extra containment. See our guide to building a DIY miter saw dust collection hood.
Miter Saw Dust Collection Port Size: Brand and Model Compatibility
One of the most common mistakes when choosing an adapter is assuming that all miter saws from one manufacturer share the same dust port dimensions.
They may not.
Different saw models can use different dust chutes, elbows, collection bags, and hose connections. Even when a manufacturer provides a general measurement, you should confirm that it applies to your exact model.
DeWalt Miter Saw Dust Collection Adapter
DeWalt provides a useful example of why both inside and outside measurements matter.
According to DeWalt support, its standardized miter saw dust duct has:
- 1.5 inches outside diameter: A 1.5-inch hose can fit over the duct.
- 1.375 inches inside diameter: A 1.25-inch hose can fit inside the duct.
This information is useful, but you should still check the dust elbow supplied with your particular saw before ordering an adapter.
If you are looking for a DeWalt miter saw dust collection adapter, check the model number and the shape of the supplied dust duct. Do not assume that a fitting for one DeWalt saw will fit another.
Bosch Miter Saw Dust Collection Adapter
Bosch provides model-specific dust collection instructions.
For example, the manual for the Bosch GCM18V-12SD states that its dust port accepts typical 35 mm vacuum hose nozzles and Bosch VH-Series hoses. It also identifies the Bosch VAC024 adapter for connecting 1-1/4-inch and 1-1/2-inch hoses.
Other Bosch models may use different accessories or connection arrangements.
If you need a Bosch miter saw dust collection adapter, check the manual for your exact model and confirm whether the adapter is included or sold separately.
Makita Miter Saw Dust Collection Adapter
For a Makita miter saw, check the model’s manual and the dimensions of its dust outlet before selecting an adapter.
Pay attention to:
- The shape of the dust port.
- Whether the dust chute is removable.
- The connection size specified in the manual.
- The hose or adapter recommended by Makita.
Do not select a fitting based only on the Makita brand name.
Ryobi Miter Saw Dust Collection Adapter
Ryobi miter saws also have model-specific dust collection arrangements.
Before purchasing a Ryobi adapter, inspect the supplied dust bag connection or dust outlet. Measure the port and compare it with the adapter’s compatibility list.
If the product listing does not identify your model, ask the seller or manufacturer to confirm the fit.
Ridgid, Metabo, Craftsman, and Hitachi Miter Saws
The same approach applies to Ridgid, Metabo, Craftsman, and Hitachi miter saws.
Check the exact model number, inspect the original dust chute, and measure the connection. Do not assume that an adapter advertised for another brand will fit.
Practical tip: Keep a note of your saw’s model number, port measurements, and vacuum hose dimensions. This makes it easier to find a replacement adapter later.
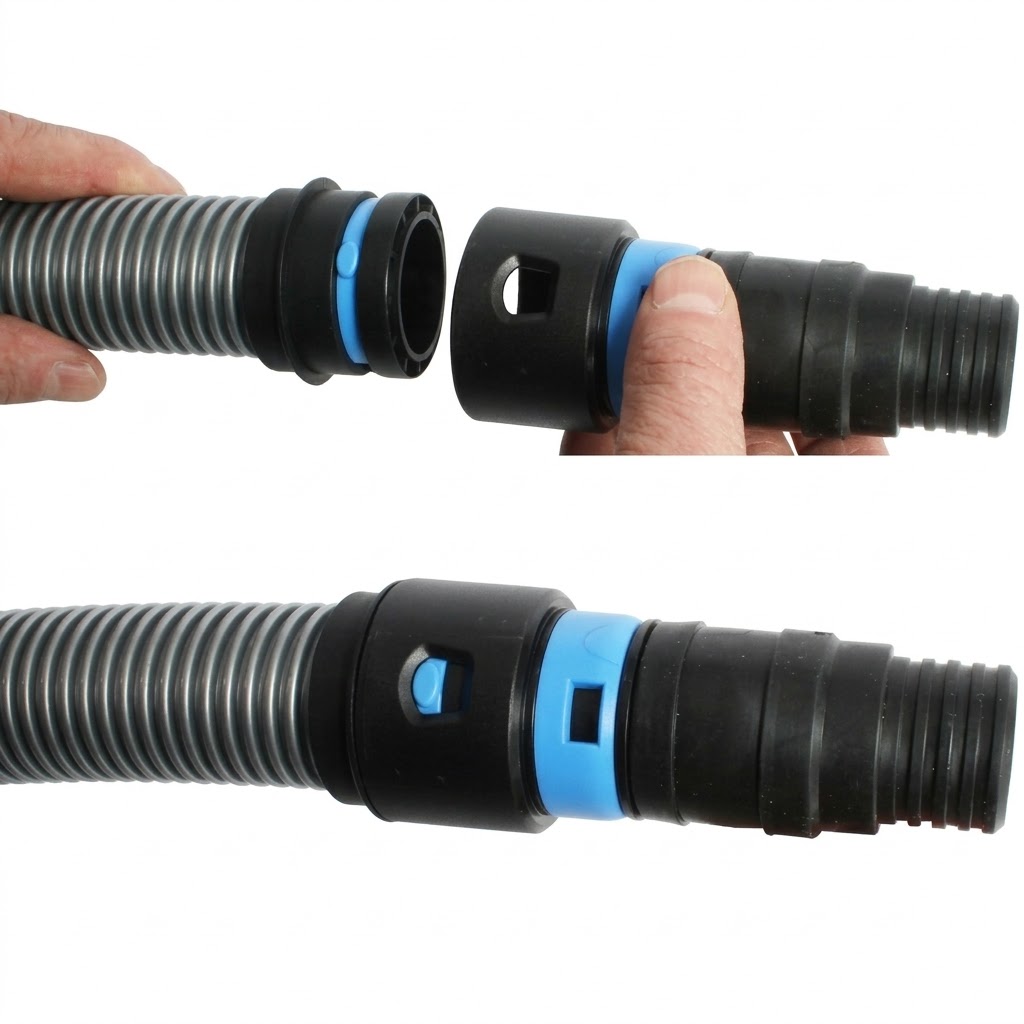
Miter Saw Dust Collection Quick Connect and Quick Disconnect Fittings
A quick-connect fitting allows you to attach or remove a vacuum hose more easily.
This can be useful if you use one shop vacuum with several woodworking tools.
Instead of repeatedly stretching a hose over different dust ports, you can use compatible connectors that join and separate quickly.
Quick-Connect Fittings
A quick-connect fitting is designed to make a connection easier to attach and remove.
Depending on the design, it may use:
- A tapered push-fit connection.
- A locking collar.
- A twist-lock connection.
- A dedicated matching connector.
The two parts must be designed to work together. Two fittings that look similar are not necessarily compatible.
Quick-Disconnect Fittings
A quick-disconnect fitting makes it easier to separate the hose from the tool.
This can be useful when:
- Moving the vacuum between tools.
- Removing the hose for cleaning.
- Storing the saw.
- Changing between different dust collection attachments.
Are Quick-Connect Fittings Necessary?
No. A standard adapter can work perfectly well if it provides a secure connection.
Quick-connect fittings are mainly a convenience. They are worth considering when you frequently move one vacuum hose between several machines.
Before using one, check that it does not introduce an unnecessarily narrow passage or come loose during normal operation.
Common Miter Saw Dust Collection Adapter Problems
Even an adapter with the correct nominal size may not work properly if the connection is poorly matched or installed incorrectly.
Here are some common problems and ways to address them.
The Adapter Is Too Loose
A loose adapter can allow air and dust to escape around the connection.
Possible solutions:
- Recheck the actual inside and outside diameters.
- Confirm that the fitting is designed to connect in the correct direction.
- Use a suitable rubber coupling if the dimensions allow it.
- Replace an incorrectly sized adapter.
Do not rely on excessive tape or an improvised connection that can come loose during operation.
The Adapter Is Too Tight
An adapter that is too tight may damage a plastic dust port.
Possible solutions:
- Check the port and adapter dimensions again.
- Use a fitting designed for the correct connection.
- Consider a flexible coupling where appropriate.
Never force a fitting onto the dust port.
The Hose Keeps Falling Off
This may happen because the adapter is too short, the connection is too loose, or the hose pulls on the fitting.
Possible solutions:
- Use a correctly sized adapter.
- Support the hose independently.
- Check whether a compatible locking connector is available.
- Make sure the hose is not stretched during saw movement.
Even with a properly fitted adapter, a clogged filter can reduce vacuum airflow and weaken dust collection. Learn how to keep a shop vac filter from clogging with sawdust.
Dust Collection Is Still Poor
A correctly fitted adapter cannot solve every miter saw dust collection problem.
The saw may still release dust because of the direction of the blade’s airflow, the design of its factory chute, or insufficient extraction at the cutting area.
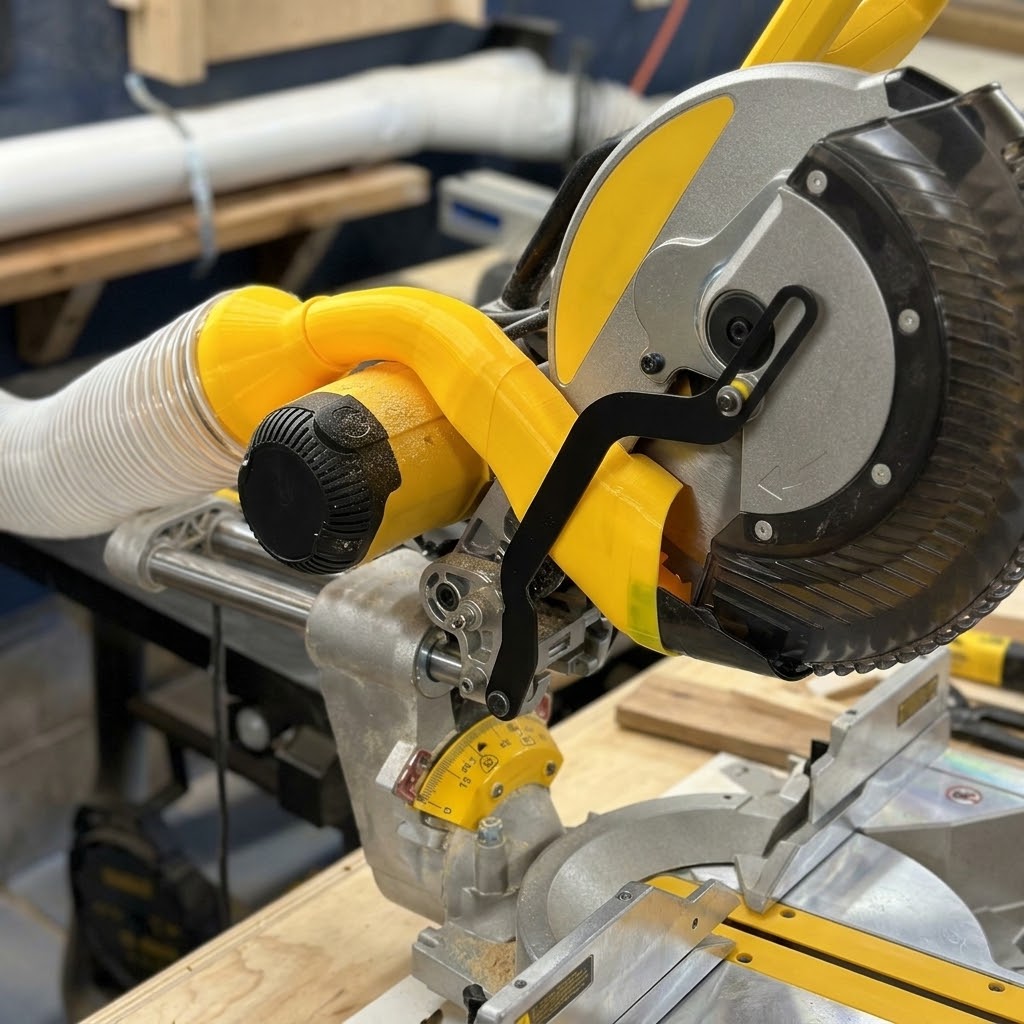
You may need to improve the overall setup with a suitable vacuum or dust extractor, a better hose arrangement, or a rear dust collection hood.
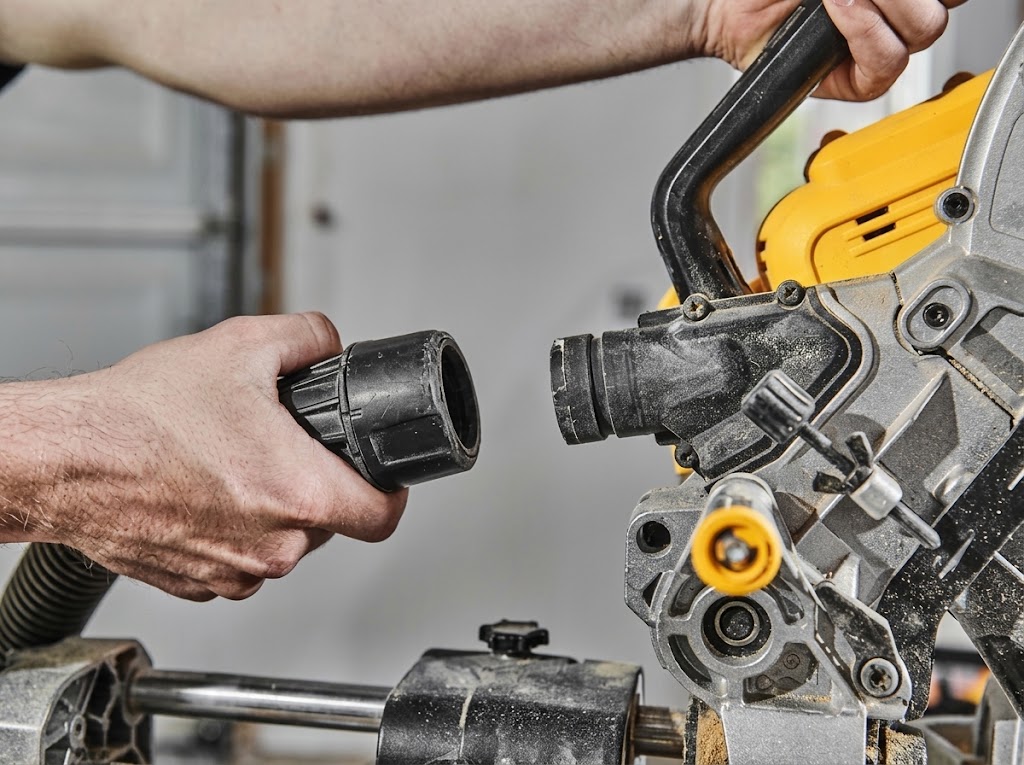
f your miter saw still releases too much sawdust after connecting a vacuum hose, see our guide on how to improve dust collection on a miter saw for additional ways to improve collection.
How to Test Your Miter Saw Dust Collection Connection
After installing the adapter, check the connection before using the saw.
Follow these steps:
- Make sure the saw is disconnected from power.
- Check that the adapter is fully seated and secure.
- Inspect the hose for kinks, sharp bends, or damage.
- Move the saw through its permitted cutting and adjustment positions.
- Confirm that the hose does not interfere with the blade, guard, rails, or workpiece.
- Make sure the hose is not pulling on the dust port.
- Reconnect power only after all checks are complete.
- Start the vacuum or dust extractor and follow the saw manufacturer’s operating instructions.
- Make a test cut using suitable scrap material and observe whether the connection stays secure.
Do not reach near the blade or attempt to adjust the adapter while the saw is running.
If the hose disconnects, the adapter moves, or the hose interferes with the saw, stop and correct the setup before continuing.
Frequently Asked Questions
Are miter saw dust ports a standard size?
No. Miter saw dust ports are not all the same size. Their dimensions and shapes can vary between manufacturers and individual models. Measure your own saw’s port and check the manufacturer’s manual before buying an adapter.
How do I know what size miter saw dust collection adapter I need?
Measure the dust port and vacuum hose connection. Record the inside and outside diameters, identify whether each fitting connects from the inside or outside, and compare those measurements with the adapter’s specifications.
Can I connect a 2-1/2-inch shop vacuum hose to a miter saw?
It depends on the saw’s dust port and the hose connector. If the dimensions do not match, you may need a suitable reducer or adapter. Check the adapter’s internal opening and make sure it does not create an unnecessary airflow restriction.
Can I use a universal miter saw dust collection adapter?
Some universal adapters fit several connection sizes, but they are not guaranteed to fit every miter saw. Check the listed dimensions, connection shape, and compatibility information before purchasing.
What is the difference between a dust port and a dust chute?
A dust port is the outlet where dust collection equipment connects. A dust chute is the passage or component that directs sawdust toward that outlet. Some saws use a removable chute or elbow as part of their dust collection arrangement.
Do I need a quick-connect fitting for my miter saw?
No. A regular adapter is sufficient if it connects securely. Quick-connect fittings are useful when you frequently move one vacuum hose between different tools.
Can I make my own miter saw dust collection adapter?
A custom adapter may be possible when standard fittings do not match the saw’s port. However, it must fit securely, maintain a suitable airflow passage, and stay clear of moving parts. Check the material and design before using a homemade fitting.
Final Thoughts
Finding the right miter saw dust collection adapter starts with measuring the actual connection points. Do not rely only on a brand name, a nominal hose size, or an adapter advertised as universal.
Measure the dust port, check the vacuum hose, identify whether the connection needs an inside-fit or outside-fit adapter, and confirm compatibility with your exact saw model.
A secure, properly sized connection makes your dust collection setup easier to use and maintain. Just remember that the adapter is only one part of the system. The vacuum, hose routing, factory dust chute, and additional dust containment all affect the overall result.