
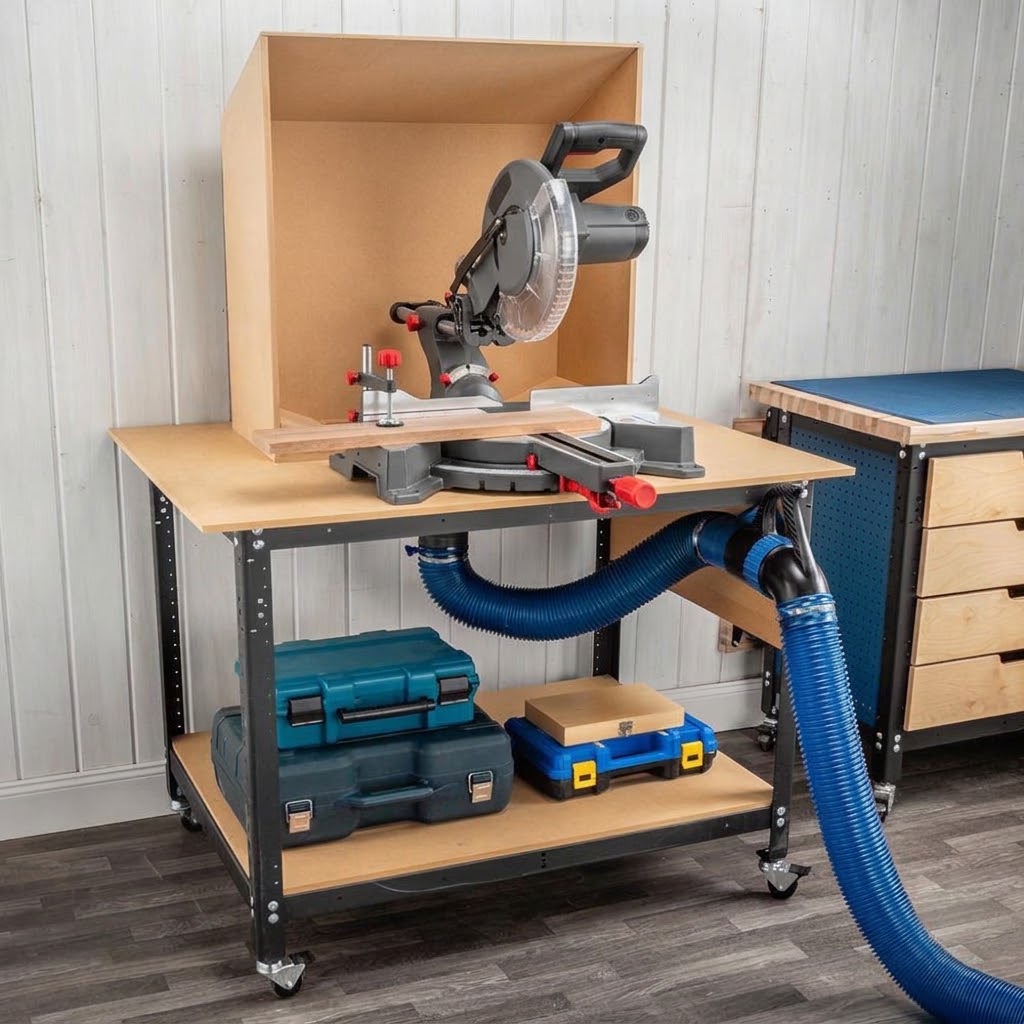
Learning how to improve dust collection on a miter saw can make a noticeable difference in workshop cleanliness, reduce the amount of sawdust that settles on nearby tools, and help limit airborne wood dust. Unfortunately, many miter saws scatter chips and fine dust around the work area, even when their factory dust bags are attached.
The problem is partly caused by the saw’s open cutting design. Unlike enclosed woodworking machines, a miter saw needs room for the blade, guard, and cutting head to move through different miter and bevel angles. The blade also throws debris in several directions, making it difficult for a small dust port to capture everything.
The good news is that you can improve an existing miter saw setup without rebuilding your entire workshop. Connecting an appropriate vacuum or dust extractor, improving hose connections, maintaining the extraction path, and adding a suitable rear collection hood can all help.
In this guide, we’ll look at 11 practical miter saw dust collection improvements, explain when each one makes sense, and show you how to choose a setup that works with your saw.
Quick Answer: What Is the Best Way to Improve Miter Saw Dust Collection?
For most existing miter saw setups, a sensible starting point is to connect a compatible shop vacuum or dust extractor to the saw’s factory dust port.
After that, check the complete extraction path:
- Make sure the saw’s dust chute is clear.
- Use a properly fitting hose adapter.
- Avoid unnecessarily long, kinked, or restricted hoses.
- Keep the vacuum filter and collection bag in good condition.
- Consider an in-line cyclone separator to collect debris before it reaches the vacuum.
- Add a rear dust collection hood if the factory port cannot capture the debris escaping around the blade.
A factory dust port and a rear hood address different parts of the problem. Combining them may improve overall containment, provided both connections are designed for the available airflow and do not interfere with saw operation.
No ordinary miter saw dust collection arrangement should be assumed to capture every particle.
Why Is Dust Collection on a Miter Saw So Difficult?
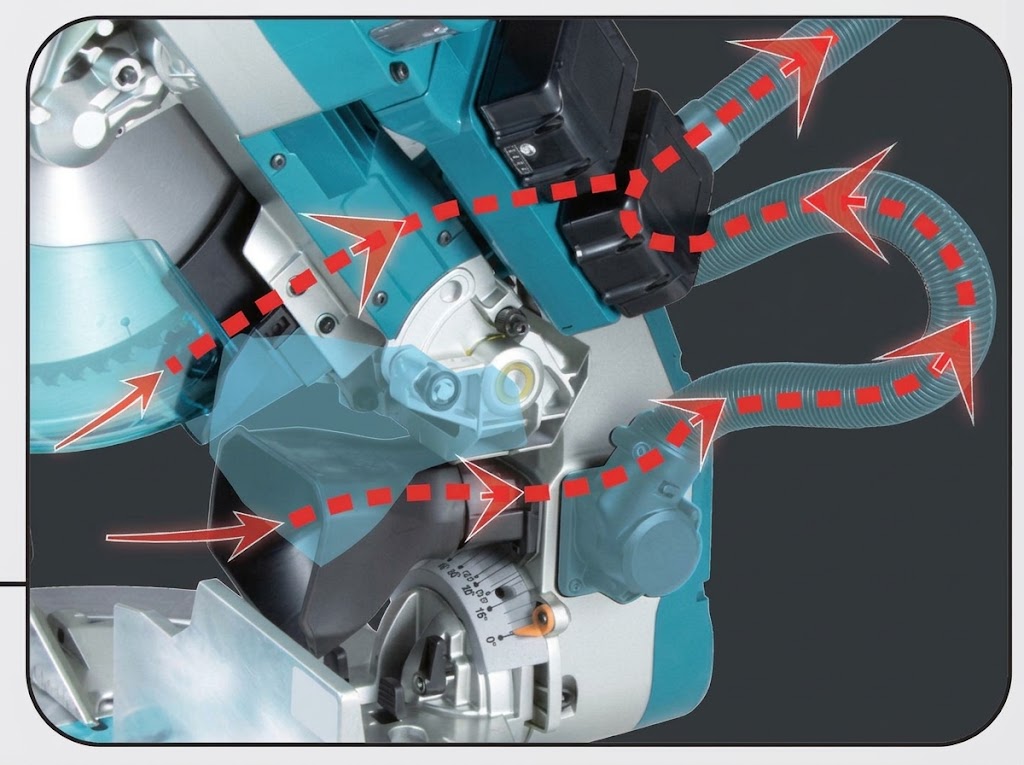
Miter saws create a challenging dust collection problem because the blade is exposed during cutting and the head must move freely.
Several factors contribute to poor collection.
1. The blade throws debris away from the dust port
As the blade cuts through wood, it carries chips and fine dust away from the cutting area. Some debris travels toward the rear of the saw, while other material escapes around the blade guard, fence, and sides of the workpiece.
A small factory dust port cannot necessarily intercept every direction of this debris.
2. The cutting area cannot be completely enclosed
A miter saw must accommodate different cutting positions, including:
- Straight 90-degree cuts
- Miter cuts
- Bevel cuts
- Compound miter cuts
- Sliding cuts on sliding compound saws
The blade guard, workpiece, and cutting head all need adequate clearance. A collection enclosure must account for this movement rather than simply sealing the entire area.
3. Sliding saws move the cutting head
A sliding compound miter saw moves forward and backward along its rails.
When the cutting head moves forward, the blade can move farther away from a rear collection opening. This makes it difficult for a fixed hood to capture all the debris.
4. Factory collection bags have limitations
The small fabric bag supplied with many saws provides basic collection, but it may not have enough airflow or capacity to manage all the chips and fine dust produced during repeated cuts.
It also needs regular emptying and maintenance.
Shop Vac vs. Dust Collector: Which Works Better for a Miter Saw?
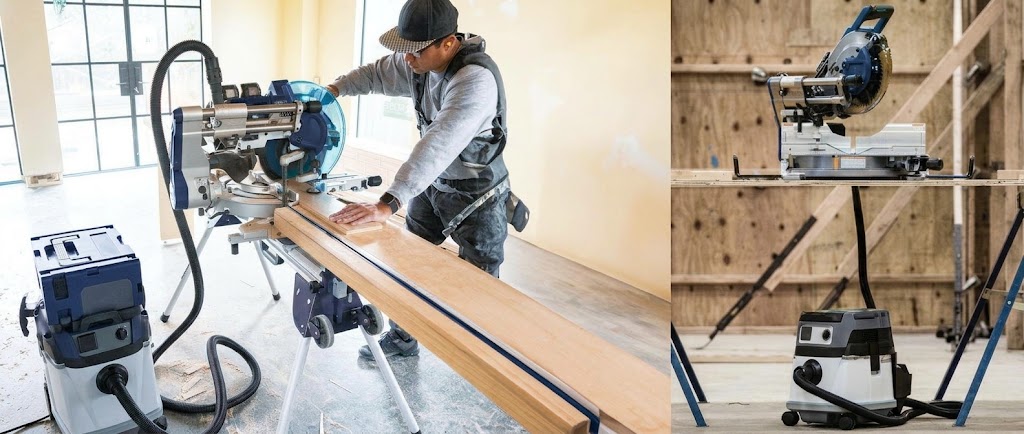
Before upgrading your setup, it helps to understand the difference between the two common extraction options.
A shop vacuum or dedicated dust extractor is often a practical choice for connecting directly to a relatively small factory dust port. These machines are designed to operate with smaller hoses and provide strong suction.
A larger dust collector is designed to move greater volumes of air through larger ductwork. It may be more appropriate for a generously sized rear hood or collection enclosure, depending on the hood design and the collector’s actual airflow at the connection.
| Feature | Shop vac or dust extractor | Larger dust collector |
|---|---|---|
| Typical connection | Smaller tool hose | Larger duct or hose |
| Common use | Factory dust port | Rear hood or larger collection opening |
| Main consideration | Suction under operating conditions | Air volume and duct resistance |
| Workshop suitability | Compact setups | Larger or more permanent systems |
| Port compatibility | Requires a suitable adapter | Requires a suitably sized hood and duct |
Important: Neither machine is automatically better in every situation. Check the saw manufacturer’s extraction requirements and the specifications of the vacuum, collector, hose, and fittings.
A large dust collector connected to a very small port through an unsuitable reduction may not perform as expected. Likewise, a shop vacuum may struggle when connected to a large, poorly designed enclosure.
11 Practical Ways to Improve Miter Saw Dust Collection
The following improvements address different parts of the collection system. You do not need to install all 11 at once. Start with the basic connections and maintenance steps before investing in larger modifications.
1. Replace the Factory Dust Bag With an Active Shop Vac
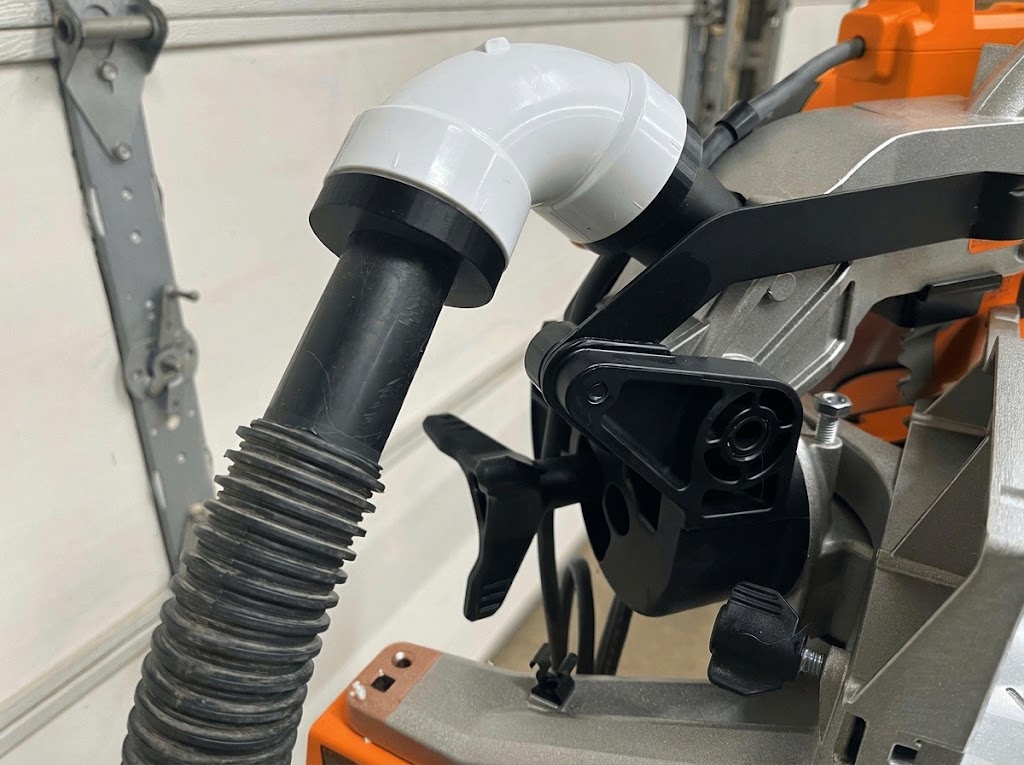
One of the simplest upgrades is replacing the small factory collection bag with a compatible shop vacuum or dust extractor.
Unlike a passive collection bag, an active vacuum continuously draws air through the saw’s dust port. This can help remove debris from the internal collection passage while the saw is operating.
How to set it up:
- Turn off and unplug the miter saw.
- Remove the factory dust bag according to the saw’s instructions.
- Check the diameter and shape of the dust port.
- Select a compatible vacuum hose and adapter.
- Attach the hose securely without forcing or damaging the port.
- Check that the hose does not interfere with the saw’s movement.
- Test the arrangement before making normal cuts.
When choosing a vacuum, do not rely on peak horsepower alone. Compare the manufacturer’s airflow and suction specifications, filtration system, hose compatibility, and performance under the intended operating conditions.
A dirty filter, long hose, restrictive adapter, or air leak can reduce performance.
2. Use the Correct Dust Port Adapter
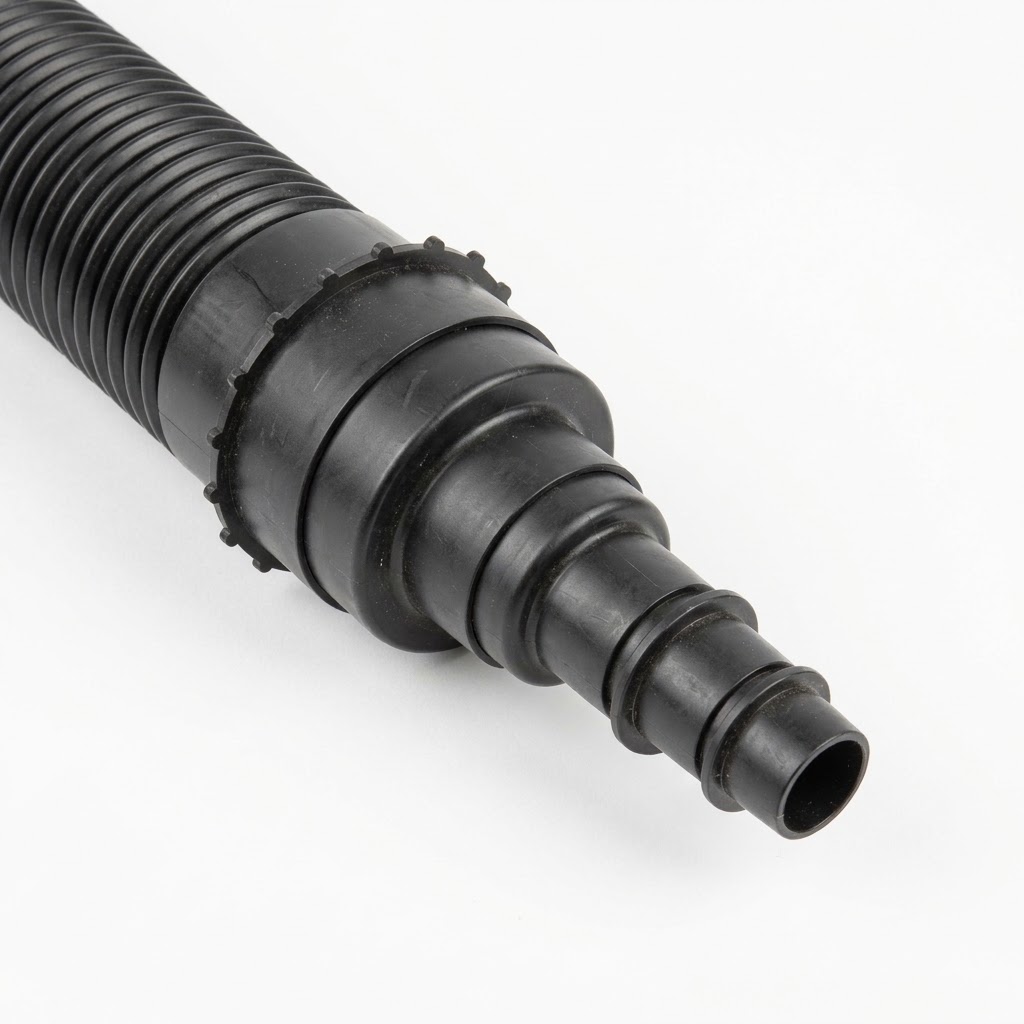
A poorly fitting adapter can make an otherwise useful extraction setup less effective.
Miter saw dust ports are not all the same size or shape. Some have round openings, while others use unusual molded outlets that require a model-specific adapter.
Before purchasing an adapter, check:
- The outside and inside dimensions of the dust port
- The diameter of your vacuum hose
- Whether the connection needs a stepped rubber adapter
- Whether the fitting can remain attached during miter and bevel adjustments
A good adapter should fit securely without placing unnecessary stress on the saw’s plastic dust outlet.
Avoid relying on loosely wrapped tape as a permanent connection. If the joint repeatedly comes loose, use a suitable purpose-made fitting or hose clamp where the manufacturer permits it.
3. Check and Clean the Factory Dust Chute
Sometimes the problem is not the vacuum. The saw’s internal dust passage may be partially blocked.
Sawdust and wood chips can collect around the dust chute, guard outlet, and connection point. A blockage or buildup can restrict the path through which debris should travel.
How to inspect it:
- Disconnect the saw from electrical power.
- Follow the manufacturer’s instructions for accessing the dust collection area.
- Inspect the outlet and accessible passages for accumulated debris.
- Remove loose dust and chips using an appropriate vacuum and soft brush.
- Reinstall any covers or components correctly before operating the saw.
Do not remove safety guards or internal components unless the manufacturer specifically permits the procedure.
Avoid using compressed air to blow accumulated dust around the workshop. It can spread fine particles into the air.
4. Use a Suitable Hose and Keep It Properly Routed
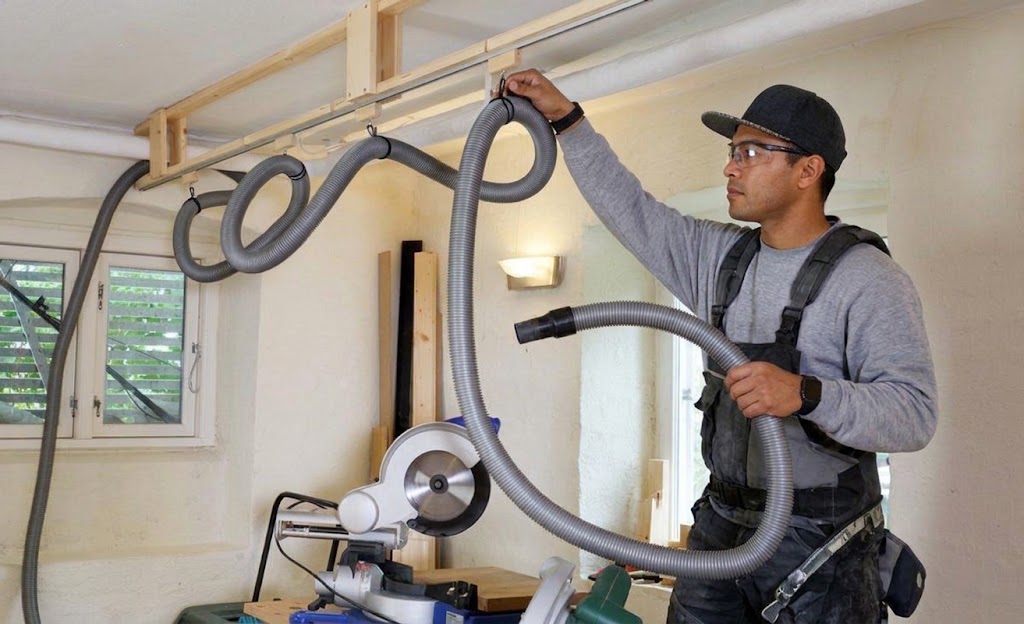
The hose connecting the saw to the vacuum can affect how well the extraction system works.
A hose that is too long, kinked, crushed, or poorly routed can add resistance and restrict airflow.
For better hose management:
- Use a hose compatible with the saw’s dust port and vacuum.
- Keep the hose as short as practical.
- Avoid sharp bends and tight loops.
- Prevent the hose from being crushed against the workbench or wall.
- Leave enough slack for the saw’s full range of movement.
A smooth-interior hose may be useful in some setups, but the correct diameter, length, and overall system design matter more than simply choosing a particular hose material.
5. Maintain the Vacuum Filter and Collection Bag
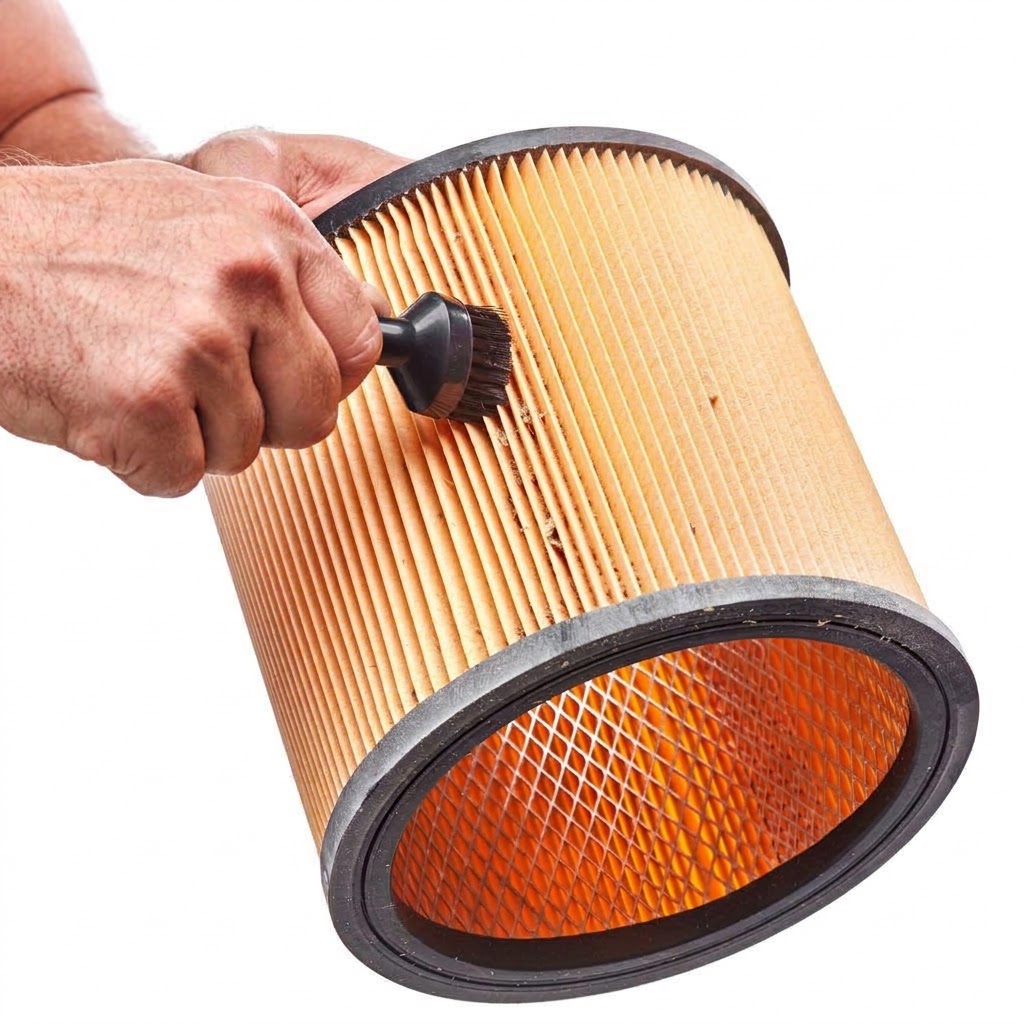
Even a suitable vacuum can lose performance when its filter becomes clogged or its collection bag is full.
Fine wood dust can accumulate on the filter surface, restricting airflow. This may become more noticeable when cutting materials that produce large amounts of fine dust.
A practical maintenance routine includes:
- Checking the collection bag before long cutting sessions.
- Emptying the container when necessary.
- Cleaning the filter according to the vacuum manufacturer’s instructions.
- Replacing damaged or worn filters.
- Checking for leaks around the vacuum lid and hose connections.
A fleece collection bag or compatible pre-filter bag may help collect debris before it reaches the main filter. Check the vacuum manufacturer’s compatibility and filtration specifications before purchasing one.
If fine dust filtration is important, look for a properly rated filtration system. A certified HEPA filter is designed to capture at least 99.97% of particles at 0.3 microns under the applicable test conditions. However, installing a HEPA cartridge alone does not automatically make the entire vacuum system HEPA-certified.
6. Add an In-Line Cyclone Dust Separator
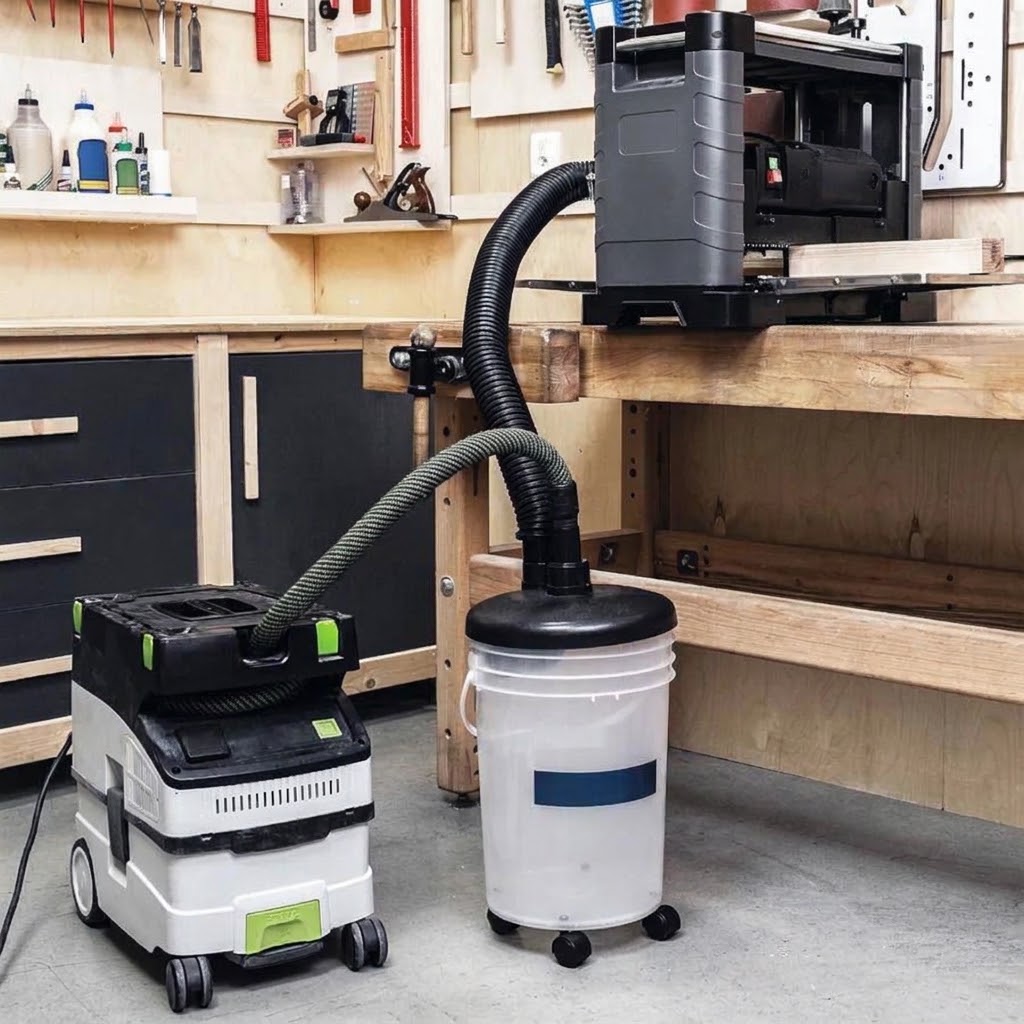
If you regularly cut solid wood, plywood, or MDF, an in-line cyclone separator may be a useful addition to your shop vacuum setup.
A cyclone separator is installed between the saw and the vacuum. Incoming debris enters the separator, where its airflow pattern helps separate heavier chips and dust into a collection container before the remaining air reaches the vacuum.
A typical arrangement looks like this:
Miter saw → cyclone separator → shop vacuum
Potential benefits include:
- Collecting larger chips before they enter the vacuum.
- Reducing how quickly the main filter becomes loaded with debris.
- Making waste collection easier.
- Reducing the frequency of vacuum container emptying.
However, cyclone separators differ in design and separation performance. Do not assume that every separator captures all fine dust or keeps the vacuum filter completely clean.
Choose a separator that is compatible with your vacuum, hose diameter, and expected debris volume. Make sure its collection container is stable and properly sealed.
7. Add a Rear Dust Collection Hood
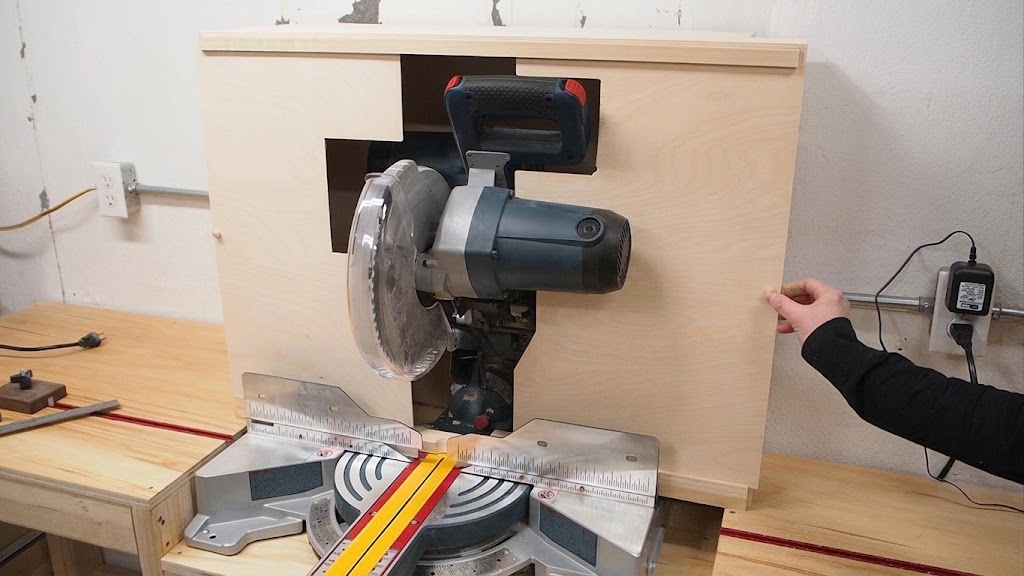
A factory dust port collects debris through the saw’s built-in extraction passage. However, some dust escapes around the blade and workpiece before it reaches that opening.
A rear collection hood provides a larger containment area behind the saw.
The hood acts as a secondary collection point. It helps intercept chips that escape the factory dust chute and directs them toward a larger extraction opening.
A rear hood can be particularly useful for:
- Sliding compound miter saws
- Repeated cutting in a fixed workshop
- Miter saw stations with available space behind the fence
- Setups where the factory dust bag or port leaves considerable debris around the work area
The enclosure must be designed around the actual saw. It should not interfere with the blade guard, sliding rails, bevel movement, miter adjustments, fence, workpiece, or operator access.
A large rear hood may work with a larger dust collector, but the opening, duct, and collector must be appropriately matched.
For detailed building instructions, see our separate guide: DIY Miter Saw Dust Collection Hood: Plans, Dimensions, and Building Guide.
8. Improve Side Containment Around the Cutting Area
A rear hood may leave open spaces on either side of the saw. Depending on the saw design and workpiece size, chips can escape through these gaps.
Side wings or adjustable containment panels can help reduce the amount of debris that escapes sideways.
Possible materials include plywood, clear polycarbonate, or other suitable workshop materials.
When designing side containment:
- Leave enough space for wide workpieces.
- Account for the saw’s maximum miter and bevel positions.
- Keep the blade guard completely unobstructed.
- Avoid sharp edges near the operator.
- Make removable panels easy to access and clean.
Transparent panels can be useful because they allow you to see inside the collection area without opening the enclosure.
Do not build a sealed enclosure that restricts access to the controls or prevents the saw from moving normally.
9. Support the Vacuum Hose Above or Behind the Saw
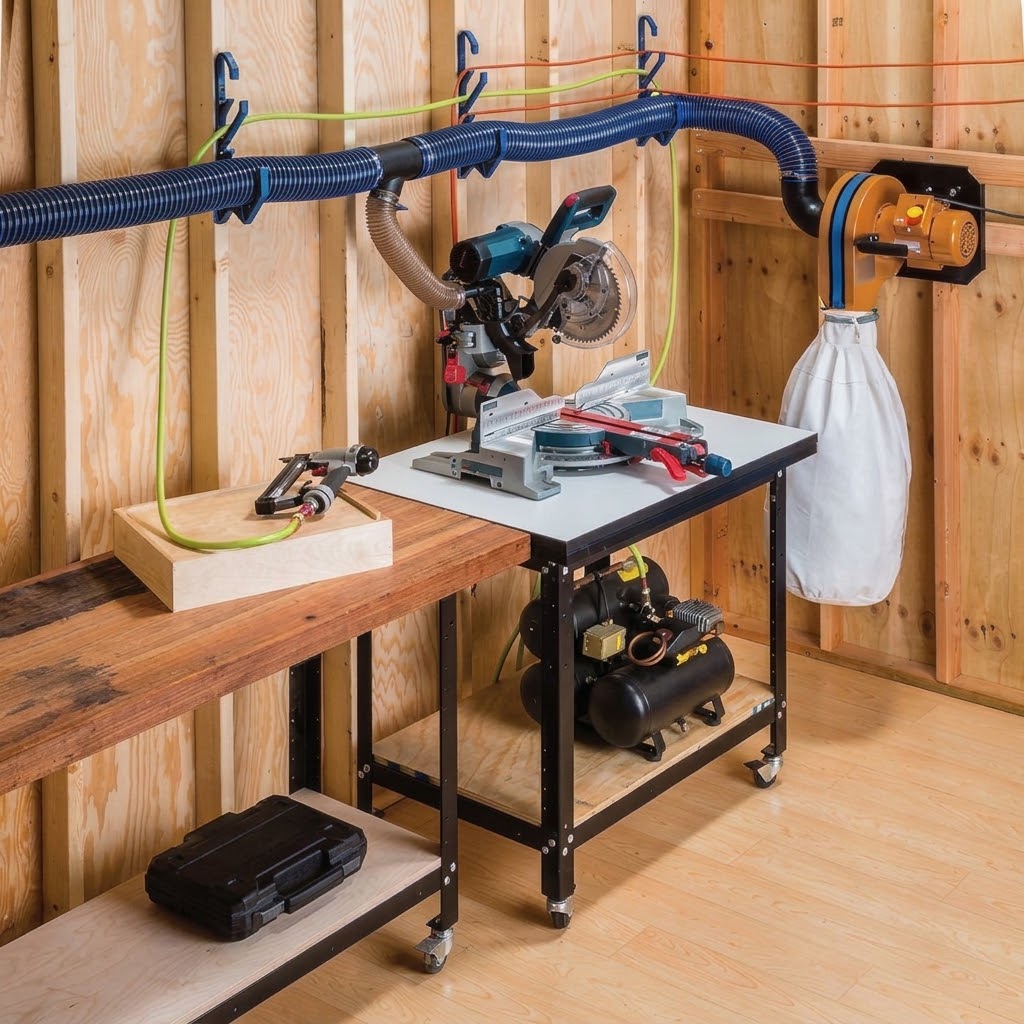
A hose hanging directly from the back of a sliding miter saw can become tangled or pull against the moving head.
This is especially inconvenient when making repeated cuts at different angles.
A hose support or overhead boom can help keep the hose away from the workpiece and moving components.
Possible solutions include:
- A ceiling-mounted hose support
- A workshop boom arm
- A suitable flexible hose hanger
- A simple overhead bungee arrangement
The goal is to provide enough hose movement for the saw without allowing the hose to sag into the cutting area.
Before using the saw, move the head through its full intended travel range with the power disconnected. Check all miter and bevel positions that you plan to use.
10. Use an Automatic Vacuum Switch
Remembering to turn on the vacuum for every cut can become inconvenient, particularly during repetitive work.
An automatic vacuum switch can start the extraction system when the connected saw operates.
Depending on the model, the switch may also provide a delayed shutoff. This allows the vacuum to continue running briefly after the saw stops, helping clear remaining debris from the hose.
Before installing one, check:
- The switch’s voltage and current rating.
- Compatibility with the saw and vacuum.
- The combined electrical load.
- Whether the switch supports the vacuum’s motor-starting requirements.
- Whether a delay feature is included.
Do not overload a workshop circuit or use an electrical device that is not rated for the equipment connected to it. Follow the switch manufacturer’s installation instructions.
An automatic switch is a convenience improvement. It does not increase the collection capacity of an undersized or poorly designed dust extraction system.
11. Inspect and Replace Damaged Factory Deflectors
Some miter saws use a flexible rubber or plastic deflector near the blade guard and dust outlet to help guide debris toward the collection passage.
If this component is damaged, missing, hardened, or incorrectly installed, the saw’s collection performance may suffer.
Inspect the deflector according to the manufacturer’s instructions.
If replacement is needed:
- Identify the exact saw model.
- Check the manufacturer’s parts diagram.
- Find the correct replacement component.
- Follow the approved installation procedure.
- Confirm that the blade guard and moving parts operate normally.
Avoid fitting a larger aftermarket rubber flap simply because it appears to catch more dust. An incompatible deflector could interfere with the blade, guard, or cutting movement.
The safest option is a manufacturer-approved replacement or a modification specifically designed and verified for that saw model.
Upgrade Comparison: Cost, Difficulty, and Main Benefit
Not every miter saw dust collection improvement requires a large investment. The following table compares the general effort involved and the main reason to consider each upgrade.
| Improvement | Relative cost | Difficulty | Main benefit |
|---|---|---|---|
| Connect a shop vac | Low–moderate | Easy | Active extraction at the factory port |
| Fit a proper adapter | Low | Easy | More secure hose connection |
| Clean the dust chute | Very low | Easy | Removes accessible blockages |
| Improve hose routing | Low | Easy | Reduces kinks and movement problems |
| Maintain filters and bags | Low–moderate | Easy | Helps maintain airflow |
| Add a cyclone separator | Moderate | Easy–moderate | Separates collected debris before the vacuum |
| Build a rear collection hood | Moderate–high | Advanced | Provides additional containment |
| Add side containment panels | Low–moderate | Moderate | Helps contain sideways chip escape |
| Install a hose support | Low–moderate | Easy–moderate | Keeps the hose away from moving parts |
| Add an automatic switch | Moderate | Easy–moderate | Starts extraction with the saw |
| Replace a damaged deflector | Varies | Model-dependent | Restores the intended collection arrangement |
Cost descriptions are relative estimates, not current product prices. Actual costs depend on your saw, workshop, materials, and equipment.
Workshop Habits That Can Help Reduce Miter Saw Dust
Equipment upgrades are only part of a good dust collection arrangement. How you operate and maintain the saw also matters.
Let the blade reach operating speed
Follow the saw manufacturer’s cutting procedure. Allow the blade to reach its normal operating speed before entering the workpiece when the manual instructs you to do so.
Keep the collection system running during cutting
If you use a manually switched vacuum, start it before making a cut. If you use an automatic switch, check that it activates reliably.
Keep the cutting area clean
Accumulated sawdust around the fence, base, and rear collection area can interfere with the setup and become airborne again.
Use an appropriate vacuum for cleanup rather than blowing dust around with compressed air.
Maintain the saw and extraction equipment
Inspect the blade guard, dust port, hoses, adapters, filters, and collection container regularly. Replace damaged components before continuing to use the equipment.
Use suitable respiratory protection
Even a well-designed collection system may leave some fine dust in the air. Use appropriate, properly fitted respiratory protection when necessary, and follow the manufacturer’s guidance for the materials being cut.
Dust extraction and respiratory protection are complementary precautions, not substitutes for one another.
How to Test Whether Your Miter Saw Dust Collection Has Improved
After making an upgrade, do not assume it works simply because the vacuum is running.
Use a simple, repeatable inspection process.
Step 1: Check the connections
Make sure the hose, adapter, and collection container are secure. Look for obvious air leaks or loose fittings.
Step 2: Check the saw’s movement
With the saw disconnected from power, move the cutting head through the intended miter, bevel, and sliding positions. Confirm that the hose and hood do not restrict movement.
Step 3: Make a test cut
Use a suitable piece of scrap material and follow the saw manufacturer’s operating instructions. Keep your hands and body in their normal safe positions.
Step 4: Inspect the collection area
Look for chips escaping around the blade guard, behind the fence, and through the sides of the hood.
Step 5: Check the vacuum and separator
Inspect the collection container, filter, and hose for signs of restriction or unexpected buildup.
If debris continues to escape, identify where it is leaving the cutting area before buying additional equipment. The problem may be a poorly fitting adapter, blocked chute, restricted hose, or a rear hood that does not cover the escape area.
Frequently Asked Questions About Miter Saw Dust Collection
Can a shop vac handle miter saw dust collection?
A shop vac can be a practical option for connecting to a miter saw’s factory dust port, provided the hose and adapter are compatible. Its effectiveness depends on the saw’s dust passage, vacuum performance, filter condition, and hose arrangement.
A shop vac may not capture all the dust thrown outside the factory collection area. A suitable rear hood can provide additional containment.
Why does my miter saw still spread dust with a vacuum connected?
The factory dust port may not capture debris that escapes around the blade, guard, or workpiece. Other possible causes include a blocked dust chute, loose adapter, kinked hose, or clogged vacuum filter.
Inspect the entire extraction path before replacing the vacuum.
Should I use a shop vac or a 4-inch dust collector?
A shop vac or dust extractor is often convenient for a small factory dust port. A larger dust collector may be more suitable for a properly designed rear hood with a larger opening.
The right choice depends on the extraction connection, airflow requirements, and equipment specifications.
Does a cyclone separator improve miter saw dust collection?
A cyclone separator can collect heavier debris before it reaches the vacuum. This may reduce the amount of material reaching the main filter and make collection easier.
However, it does not automatically improve capture at the blade or guarantee that all fine dust will be separated.
Can I build a rear dust collection hood for any miter saw?
A rear hood can be adapted to many miter saw setups, but its dimensions must be based on the actual saw and workspace.
Sliding movement, miter and bevel angles, blade guard clearance, fence access, and workpiece support must all be considered before building.
Is a dust collection bag enough for a miter saw?
A factory dust bag provides basic collection, but it may not capture all the chips and fine dust produced during cutting. An active extraction system and, where appropriate, an additional rear hood may improve containment.
Should I use a HEPA filter with my shop vac?
A properly rated HEPA filtration system can provide a higher level of fine-particle filtration than a standard filter. Check that the filter is compatible with your vacuum and understand whether the complete machine is certified for HEPA performance.
Remember that filtration at the vacuum does not guarantee that all dust is captured at the saw.
Final Thoughts
Improving miter saw dust collection does not necessarily require a complete workshop renovation. Start by checking the factory dust port, connecting a compatible shop vacuum or extractor, and making sure the hose and filter system are in good condition.
If dust continues to escape around the cutting area, consider adding a suitable rear collection hood and side containment. A cyclone separator, hose support, or automatic switch can make the overall setup more convenient to maintain.
The most effective arrangement depends on your saw, the materials you cut, and the space available in your workshop. Make changes gradually, check compatibility, and never allow a dust collection modification to interfere with the blade guard or normal saw operation.
A cleaner workshop starts with capturing dust as close to its source as practical, maintaining the extraction equipment, and using appropriate protective measures when cutting wood.