
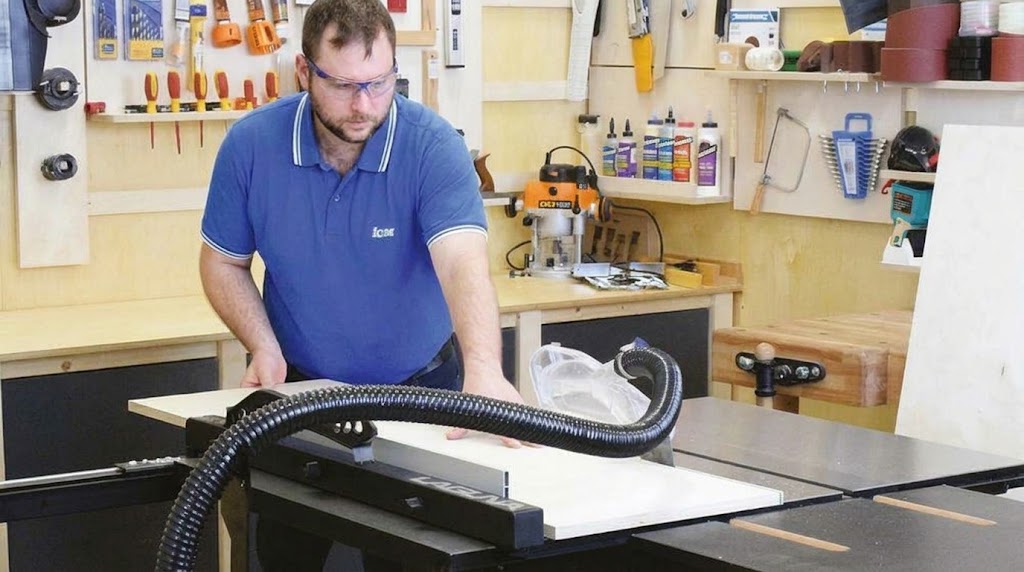
Learning how to improve dust collection on a table saw can make a big difference in keeping your woodworking shop cleaner and reducing airborne sawdust. A table saw is one of the most useful tools in a woodworking shop, but it can also be one of the biggest sources of sawdust. Even when your saw has a dust port and a shop vacuum or dust collector attached, you may still find piles of chips underneath the machine, dust across the workbench, and fine particles floating in the air.
The problem is that table saws produce dust in more than one place. The spinning blade throws debris below the table and into the saw housing, while some dust escapes above the table and travels toward the operator. A single collection port often cannot capture everything.
The good news is that you can improve table saw dust collection without necessarily buying an entirely new system. The right combination of better connections, controlled cabinet openings, effective dust hoods, suitable airflow, and regular maintenance can make a noticeable difference.
In this guide, you’ll learn nine practical ways to improve dust collection on a table saw, how to choose the right equipment, and which common mistakes can undermine your setup.
Why Is Your Table Saw Dust Collection So Poor?
Before upgrading anything, identify where the dust is escaping.
Most table saws struggle with one or more of these problems:
- Open cabinet or housing: Dust escapes through large gaps instead of moving toward the collection port.
- Poor dust capture above the blade: The lower dust port cannot collect every particle thrown upward by the blade.
- Restricted airflow: Long hoses, tight bends, undersized adapters, clogged filters, or blocked ports limit collection performance.
- Incompatible equipment: A small shop vacuum may not move enough air for a large cabinet-style saw, while a large dust collector may not connect efficiently to a small jobsite saw.
- Poorly maintained equipment: Sawdust buildup and dirty filters reduce performance over time.
The best solution depends on your saw type, dust port size, available space, and existing collection equipment. Start with the simplest fixes before investing in expensive upgrades.
1. Check and Improve the Existing Dust Port
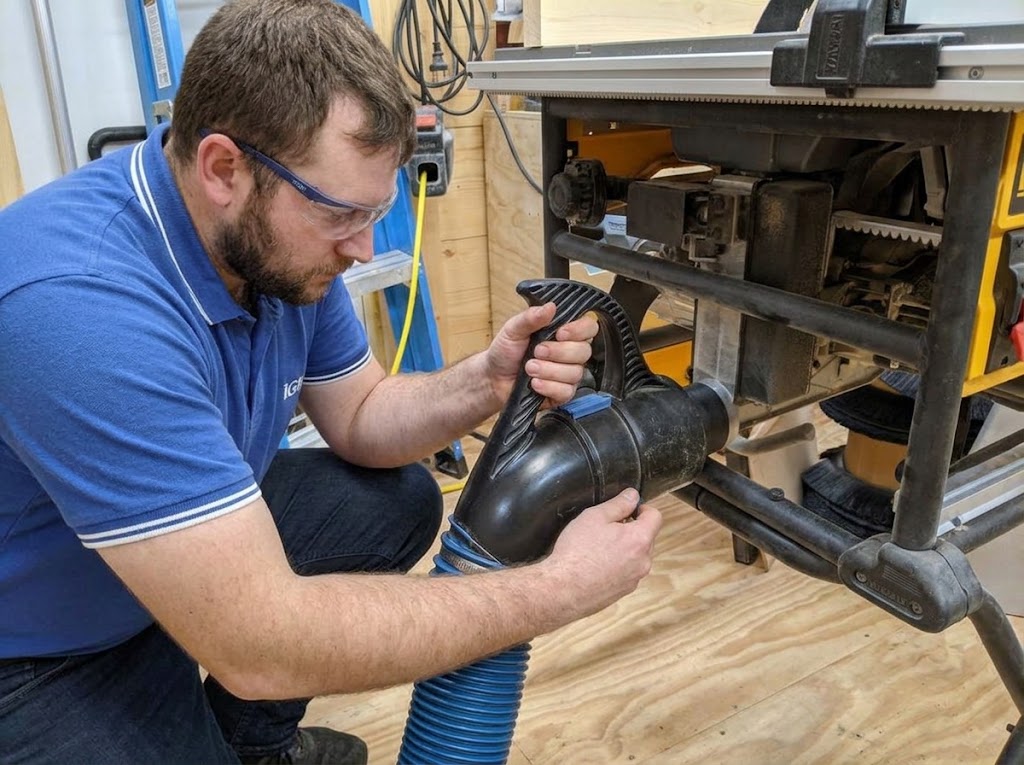
Your first step should be to inspect the dust collection port already installed on your table saw.
Unplug the saw before inspecting the housing. Look for packed sawdust, wood chips, obstructions, damaged fittings, and loose hose connections. Check that the port is not blocked by debris from previous cuts.
Next, inspect the connection between the saw and your vacuum or dust collector. A hose that appears connected may still leak air around a loose adapter or poorly fitted joint.
What you can do
- Remove accumulated sawdust from the housing and collection opening.
- Check the port diameter and compare it with your hose.
- Replace cracked, loose, or poorly fitting adapters.
- Secure connections with suitable clamps where needed.
- Make sure the hose does not collapse or kink when the saw is moved.
If the saw has a small factory port, use a properly sized adapter rather than forcing a larger hose onto it. Remember that an adapter cannot make a small port move more air than the system can support.
Best for: Anyone experiencing poor collection who wants to troubleshoot before buying additional equipment.
2. Reduce Uncontrolled Gaps Around the Saw Housing
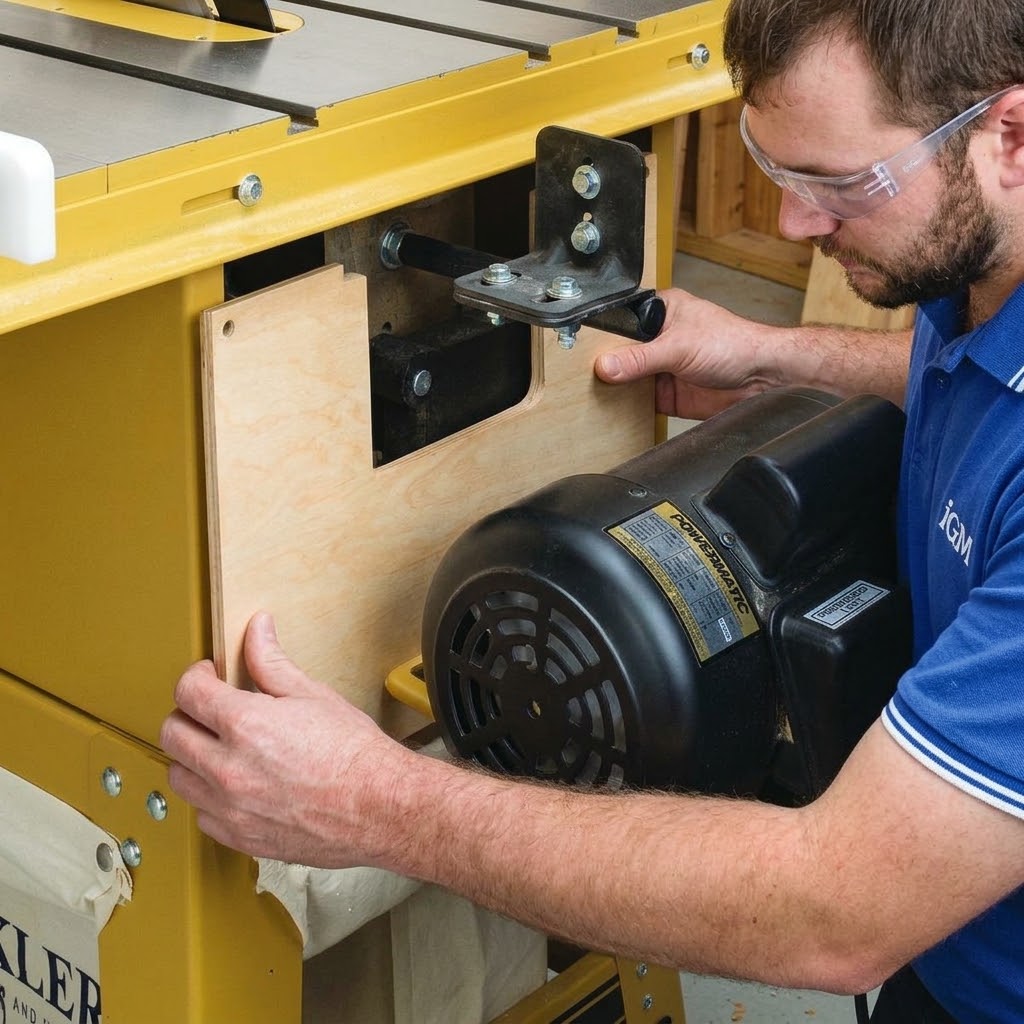
Many contractor-style and portable table saws have openings around the housing, rear panel, blade-tilt mechanism, or underside of the table. These openings can allow sawdust to escape before it reaches the collection port.
Reducing large, unnecessary openings can help direct airflow through the intended collection area. Woodworking publications have demonstrated removable panels and other simple modifications as ways to improve dust containment on certain contractor saws.
However, the goal is not to make the entire saw airtight.
How to approach this improvement
- Identify the largest openings through which dust escapes.
- Check whether each opening is necessary for motor cooling, blade movement, belt access, or maintenance.
- Consider a removable panel or suitable gasket for an opening that can safely be covered.
- Make one change at a time and inspect the results after a short test cut.
Foam gaskets, brush strips, or removable panels may be appropriate in some locations, depending on the saw design.
Never cover motor ventilation openings or interfere with belts, trunnions, blade-height adjustments, or blade-tilt mechanisms. Preserve the access needed for servicing and cleaning.
Some saws also need a controlled path for incoming air. If you close too many openings, you can reduce the air available to carry dust toward the collection port.
Best for: Contractor and cabinet-style saws with large, uncontrolled openings around the housing.
3. Add or Improve a Dust Collection Hood Under the Table
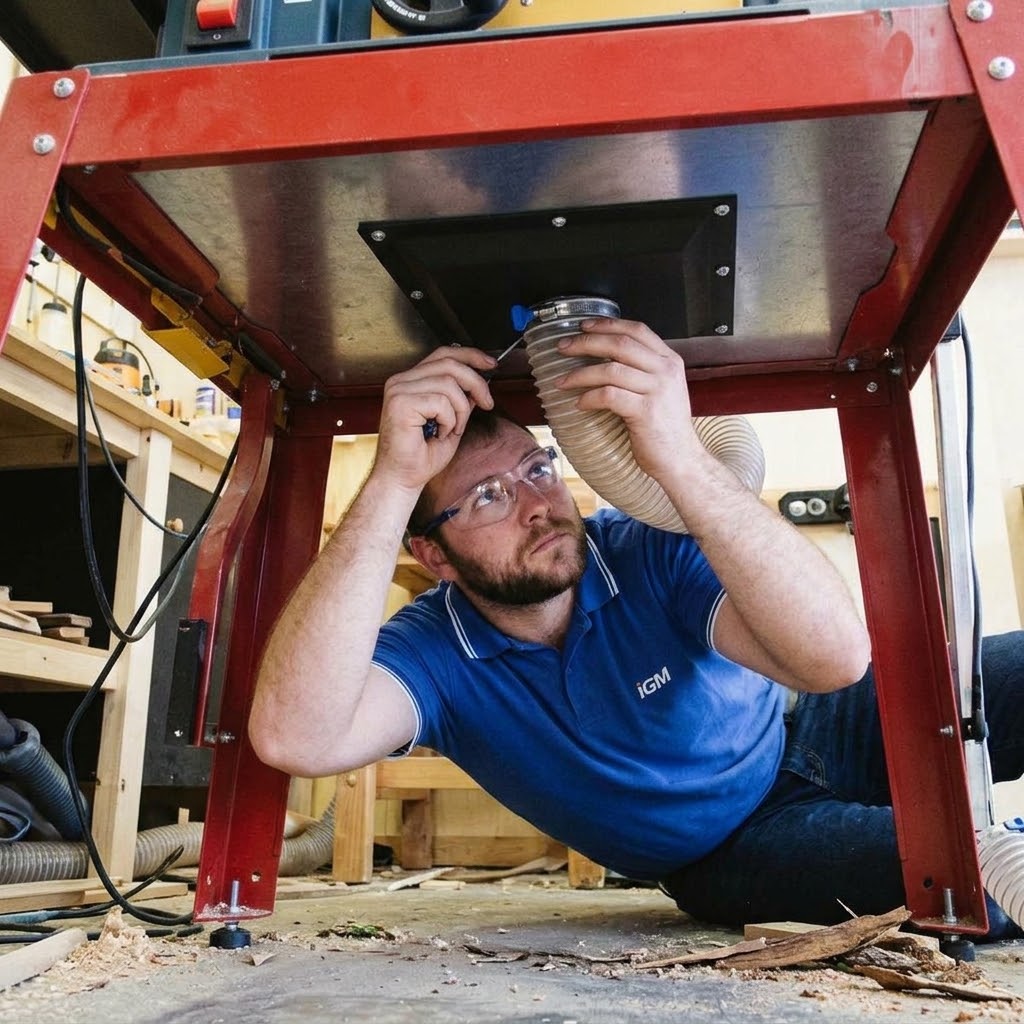
A lower dust hood helps direct sawdust and chips toward the collection hose. It is particularly useful when debris accumulates underneath the saw despite having a working dust port.
Some table saws have an enclosed cabinet with a well-positioned collection port. Others have an open bottom or a housing that does not guide debris effectively toward the outlet.
A suitable lower hood can help contain debris and direct it toward the collection system.
What to look for
- Compatibility with your particular table saw.
- Enough clearance for the blade, arbor, trunnions, and tilt mechanism.
- A hose connection that matches your collection setup.
- A shape that guides debris toward the outlet without creating an obstruction.
- Access for removing accumulated chips and performing maintenance.
Before purchasing a retrofit hood, measure the available space and verify the manufacturer’s compatibility information. Universal hoods do not necessarily fit every saw.
If you build a DIY hood, make sure it is securely mounted and cannot shift into the blade or moving components.
Best for: Saws that allow significant debris to fall into an open or poorly contained lower area.
4. Improve Dust Capture Above the Blade
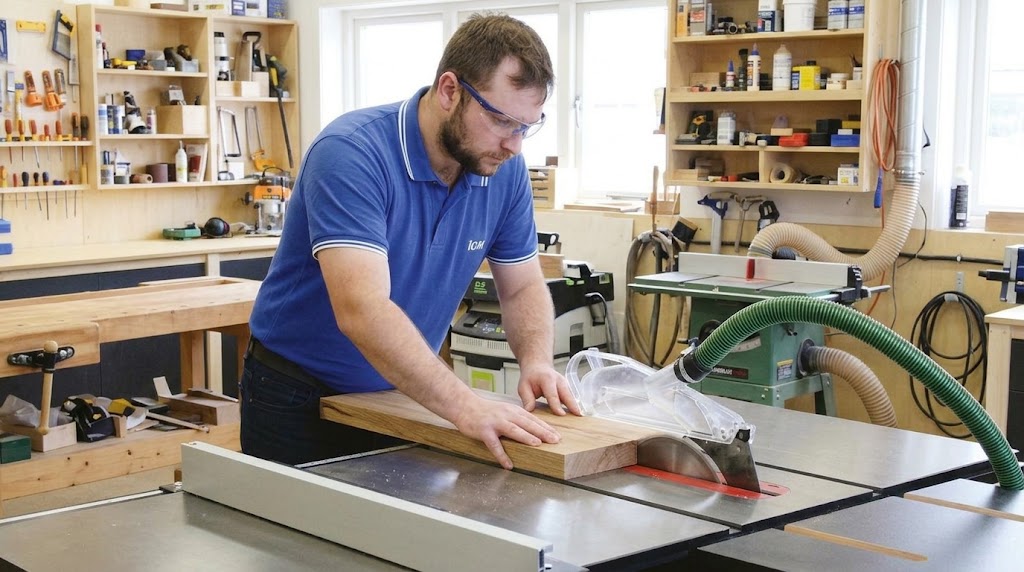
One of the most overlooked table saw dust collection improvements is collecting dust above the table.
The blade throws particles in different directions as it cuts. A lower collection port can capture much of the debris inside the housing, but it cannot reliably capture everything that escapes above the table.
An overhead dust collection guard or compatible blade guard with an extraction port can collect some of this escaping dust close to its source.
Available options
Blade guard with a dust port: Some guards include a connection for a smaller extraction hose. Check whether your saw supports this arrangement and whether the guard remains compatible with your blade and riving knife.
Overarm dust collection system: An overhead arm supports a hood above the cutting area. This can be useful in a stationary workshop, although it requires space and a suitable mounting arrangement.
Separate upper extraction line: In a workshop with a suitable dust collector, a dedicated upper hose may be connected alongside the lower collection line using an appropriately designed system.
A top pickup can improve collection, but its effectiveness depends on hood placement, airflow, and the saw’s design. A badly positioned hood may interfere with feeding long boards or reduce visibility.
Never remove or disable the blade guard or riving knife simply to accommodate a dust collection accessory. Choose a compatible arrangement and follow the saw manufacturer’s instructions.
Best for: Woodworkers who already collect dust underneath the saw but still see dust escaping above the table.
5. Use the Right Hose Diameter and Reduce Restrictions
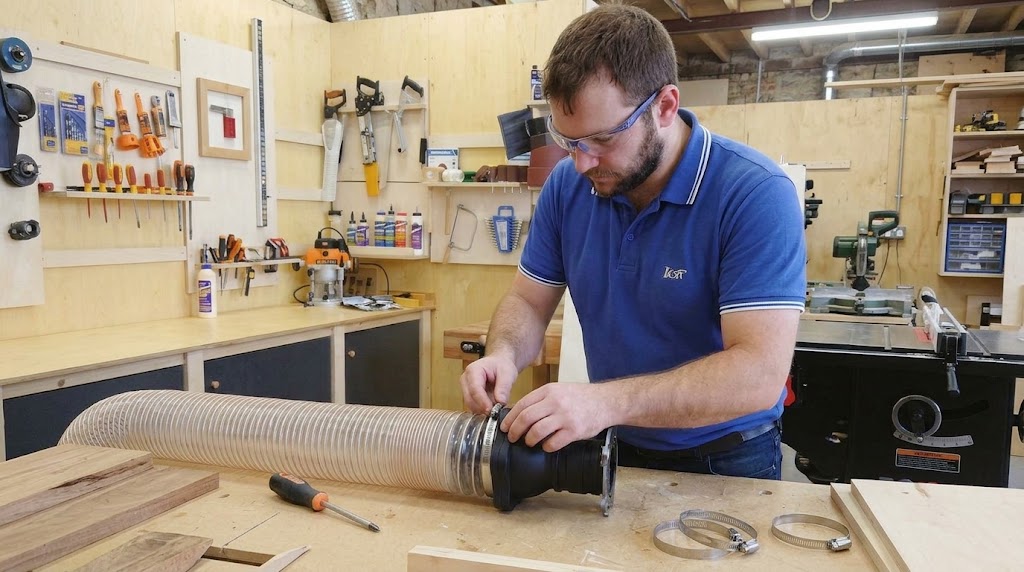
The hose connecting your table saw to the collection system has a direct effect on performance.
A narrow hose may be suitable for a small tool port, but it can restrict airflow when connected to equipment designed for a larger duct. On the other hand, fitting a large hose to a small port does not automatically increase the amount of air the system can move.
The correct diameter depends on the saw, port size, collector, and complete duct arrangement.
How to improve the hose setup
- Use the largest practical hose diameter supported by the saw and collection system.
- Keep flexible hose runs as short as reasonably possible.
- Avoid tight bends, crushed sections, and unnecessary reducers.
- Secure adapters so air does not leak at the joints.
- Support long hoses so they do not sag or become kinked.
Corrugated flexible hose is convenient around movable equipment, but its ridged interior can create more airflow resistance than smooth-wall ducting. For permanent installations, suitable smooth ducting may improve efficiency.
Do not replace a manufacturer’s specified hose with a different diameter without checking compatibility. Airflow requirements vary between small portable saws and larger stationary machines.
If you need to connect a 4-inch collection line to a smaller saw port, use a properly fitted reducer and recognize that the smaller section may limit the system.
Best for: Workshops with long, flexible, tangled, or poorly fitted hoses.
6. Match the Dust Collector or Shop Vacuum to Your Saw
A table saw can be connected to a shop vacuum, a dedicated dust collector, or a larger workshop collection system. The right choice depends on the saw’s ports and the type of debris you need to collect.
Shop vacuum
A shop vacuum is often practical for portable table saws with smaller dust ports. It is compact and can also serve other workshop tools.
Its limitation is that a small hose and restricted port may not provide the airflow needed for effective collection from a larger cabinet-style saw. A vacuum may capture chips well at the connection while still leaving substantial dust escaping elsewhere.
Dedicated dust collector
A dust collector is generally better suited to stationary woodworking machinery designed to move larger volumes of air through larger ports and ducting.
For a cabinet saw with a 4-inch port, a compatible dust collector may be a more appropriate starting point than a small shop vacuum. Actual performance depends on the collector’s airflow under operating conditions, duct resistance, filtration, and the saw’s design.
What about a cyclone separator?
A cyclone separator or shop-vac separator can capture larger chips before they reach the vacuum filter or collection bag. This can help reduce filter loading and make waste disposal easier.
However, the separator introduces additional resistance and connections. It does not increase the vacuum’s airflow, and a poorly sealed setup may perform worse than a direct connection.
Before buying new equipment, verify the required airflow, port diameter, filter performance, and manufacturer’s recommendations.
Best for: Woodworkers whose existing vacuum or dust collector cannot keep up with the saw.
7. Keep Filters Clean and Check for Blockages
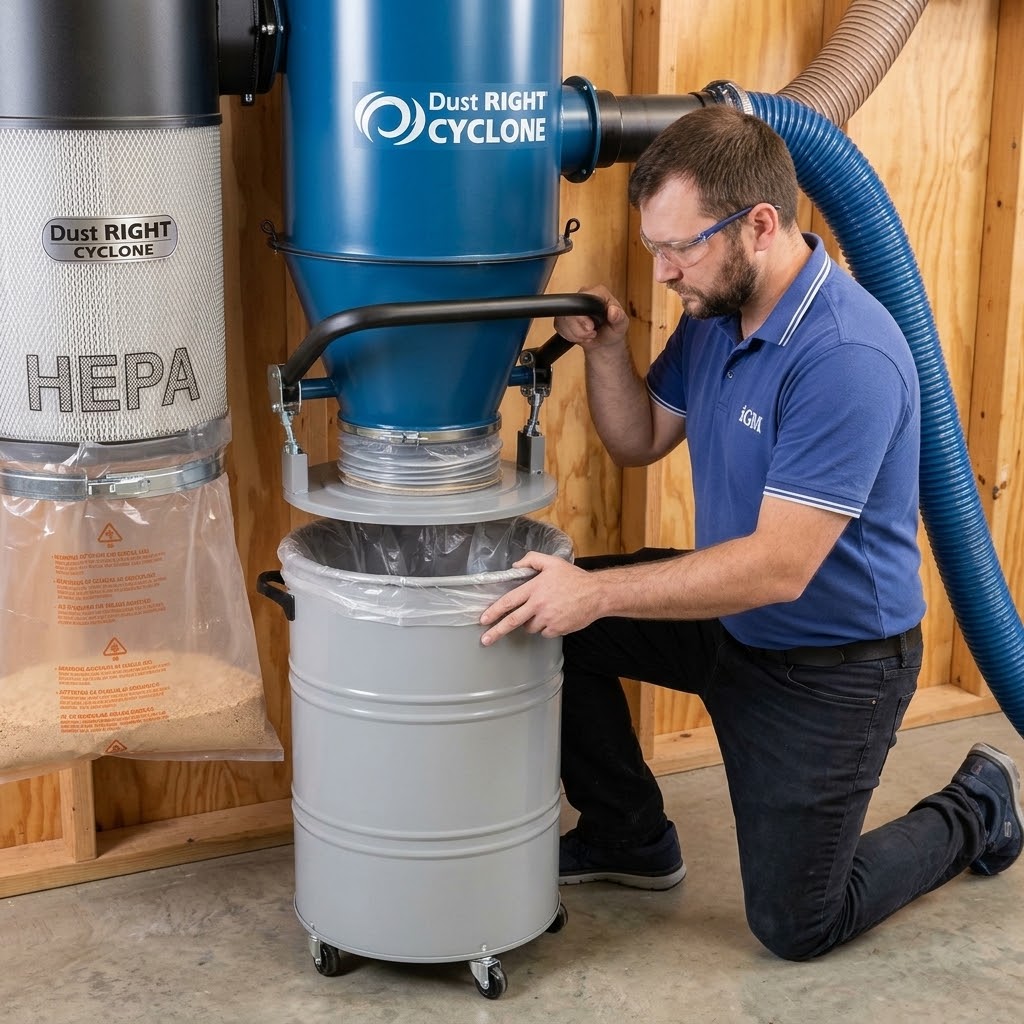
Even a properly sized dust collector can perform poorly when its filter is clogged or its hose is obstructed.
Fine dust gradually accumulates on filters, while chips and scraps can collect inside hoses, adapters, and the saw housing. These restrictions reduce the air available for collecting new debris.
A simple maintenance routine
- Disconnect the equipment from power before inspecting hoses or internal passages.
- Empty the collection bag or bin when necessary.
- Clean the filter using the manufacturer’s recommended method.
- Inspect the hose and fittings for blockages, damage, and loose connections.
- Check that blast gates and other controls are fully open when the saw is in use.
- Reassemble the system securely before testing it.
Avoid shaking, brushing, or blowing out a filter in a way that releases fine dust into the workshop. Follow the filter manufacturer’s instructions, and use suitable respiratory protection when maintenance could expose you to dust.
A replacement filter may be worthwhile if the existing one is damaged, unsuitable for the dust collector, or no longer performs properly after appropriate cleaning.
Do not assume that a HEPA label on a vacuum or filter automatically means your entire dust collection system captures all hazardous airborne particles at the saw. Collection efficiency depends on the complete setup.
Best for: Anyone whose dust collection performance has gradually deteriorated.
8. Improve the Duct Layout and Connection Points
If you use a central dust collection system, the layout between the collector and the saw can make a substantial difference.
Long runs, sharp bends, unnecessary transitions, and poorly designed branch connections increase resistance. The collector may be powerful enough in principle but unable to deliver the required airflow at the saw.
Practical layout improvements
- Position the collector reasonably close to the saw when possible.
- Reduce unnecessary hose length and sharp turns.
- Use suitable smooth-wall ducting for permanent runs.
- Choose fittings designed for dust collection rather than improvised connections.
- Close unused blast gates so airflow is directed to the machine in use.
- Seal leaking joints and support ducting securely.
For a multi-machine workshop, a planned duct system can be more effective than running long lengths of flexible hose to every tool.
A properly designed Y-fitting may be preferable to a sharp T-junction in some branching arrangements, but fitting choice should follow the duct system’s design and airflow requirements.
If you operate multiple machines, check whether your collector is designed to serve them simultaneously. Opening several branches can reduce the airflow available to the table saw.
Best for: Stationary table saws connected to a shared workshop dust collection system.
9. Test the Setup and Control the Remaining Airborne Dust
Once you’ve made improvements, test the system instead of assuming that a new hose or hood has solved the problem.
With the saw unplugged, inspect the installation and confirm that the blade, guard, riving knife, and all moving mechanisms have adequate clearance. Reconnect the system only after everything is secure.
Then perform a short test cut on scrap material while using the saw normally and keeping all required safety devices in place.
Inspect the table, floor, housing, and nearby surfaces. Notice whether chips are still escaping from the cabinet or whether fine dust is accumulating around the upper blade area.
If collection remains weak, work through the system methodically:
- Check for a blocked port or dirty filter.
- Inspect for leaks and crushed hoses.
- Confirm that the collector and hose are compatible.
- Reassess the lower hood and upper blade pickup.
- Check for restrictions in the ductwork.
You can also use a suitable workshop air cleaner to reduce some airborne particles that escape source collection. An air cleaner is a supplementary measure, not a substitute for effective extraction at the blade.
Wood dust can present respiratory and other health hazards. Use appropriate respiratory protection when needed, maintain adequate ventilation, and follow relevant workplace safety guidance. Avoid dry sweeping or compressed-air cleaning that sends settled dust back into the air.
Best for: Verifying improvements and identifying the remaining weak points in your system.
Which Table Saw Dust Collection Upgrade Should You Make First?
You do not need to buy every accessory at once. Start with the problem you can identify.
| Problem | First improvement to consider |
|---|---|
| Weak suction at the port | Check filter, blockages, leaks, and hose restrictions |
| Dust escaping beneath the saw | Inspect housing gaps and consider a compatible lower hood |
| Dust flying above the table | Consider a compatible blade-guard port or overhead collection hood |
| Long, tangled flexible hose | Shorten the run and reduce tight bends |
| Shop vacuum fills with dust quickly | Consider a compatible separator and suitable filtration |
| Dust collector struggles with a cabinet saw | Check the collector’s airflow capability and the complete duct system |
| Dust remains suspended in the workshop | Improve source capture and consider supplementary air filtration |
The most effective upgrade is the one that addresses the actual cause of poor collection. A new collector will not necessarily solve a badly positioned hood, and a new hose will not fix a blocked filter.
Table Saw Dust Collection Troubleshooting: Problems, Causes, and Fixes
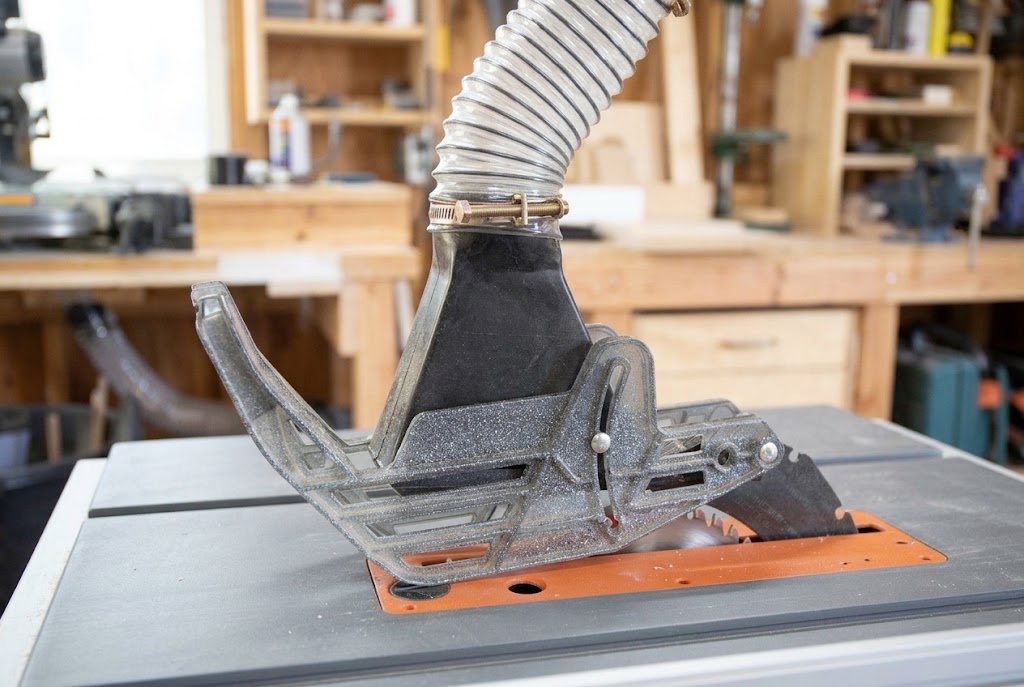
Even after improving your table saw’s dust collection system, some sawdust may continue to escape. The problem is not always the dust collector itself. Restricted airflow, poor hose connections, leaks around the cabinet, and incorrectly positioned pickup points can all reduce collection performance.
Use the troubleshooting table below to identify common problems and possible solutions.
Common Table Saw Dust Collection Problems and How to Fix Them
| Dust collection problem | Possible cause | Recommended fix |
|---|---|---|
| Large amounts of sawdust collect beneath the table | Lower dust hood is poorly positioned or has gaps | Inspect the lower hood and direct debris toward the extraction port |
| Fine dust escapes above the blade | No effective upper dust pickup | Consider a compatible overhead blade-guard dust collection system |
| Dust escapes from the rear of the saw | Loose hose connection or leaking cabinet opening | Check fittings, seals, and cabinet gaps |
| Dust spreads across the workshop during cutting | Insufficient airflow or ineffective pickup placement | Check the extraction system and improve pickup positioning |
| Shop-vac filter clogs quickly | Fine dust is reaching the vacuum filter | Consider installing a cyclone separator before the vacuum |
| Dust collector seems weak | Blocked filter, full container, clogged hose, or leaking connection | Inspect the entire airflow path and clean or repair restrictions |
| Dust collects inside the saw cabinet | Poorly directed airflow or inadequate lower enclosure | Improve the lower collection arrangement without blocking ventilation |
| Dust collection becomes worse when using a long hose | Excessive hose length, sharp bends, or restrictive fittings | Shorten the hose where practical and reduce unnecessary bends |
| Dust leaks around the dust port | Incorrect adapter or loose connection | Use a properly sized adapter and secure the connection |
| Dust escapes when making bevel cuts | Blade angle changes the direction of debris | Check lower hood coverage and maintain compatible overhead collection |
| Collection performance drops as work continues | Filter loading or a filling collection container | Check filter condition and empty the container when needed |
| Hose disconnects during operation | Poorly secured fitting or hose tension | Secure the connection and support the hose to prevent pulling |
How to Diagnose the Problem Step by Step
If you are unsure where dust is escaping, inspect the system in a logical order.
1. Check the dust collector first
Make sure the vacuum or dust collector is operating correctly. Inspect the filter, collection container, hose, and inlet for blockages or excessive restrictions.
2. Inspect every hose connection
Loose fittings can allow air to enter the system and reduce effective airflow at the pickup point. Check the connections at the saw, separator, and dust collector.
3. Identify where the dust escapes
Determine whether the problem occurs above the table, beneath the blade, around the cabinet, or at a hose connection. The location helps identify which pickup point or component needs attention.
4. Check the lower collection area
Inspect the cabinet, lower hood, and dust port for accumulated debris, gaps, or obstructions. Make sure the enclosure does not interfere with the motor, blade mechanism, or cooling airflow.
5. Evaluate the overhead pickup
If fine dust escapes above the table, check whether an overhead pickup is properly positioned and compatible with the saw. Make sure the guard remains functional and the hood does not interfere with safe cutting.
6. Test the system again
After making one change, test the collection system using a suitable piece of scrap material and normal safe operating procedures. Observe whether the dust problem improves before making additional modifications.
Important Dust Safety Reminder
A table saw dust collection system cannot guarantee that all airborne wood dust will be captured. Continue using appropriate respiratory protection and workshop ventilation when necessary. Never remove the blade guard or riving knife to improve dust collection, and always follow the table saw manufacturer’s safety instructions.
Frequently Asked Questions
Can I improve table saw dust collection without buying a new dust collector?
Yes. Start by cleaning the filter and port, fixing leaks, correcting hose restrictions, and improving how dust is directed toward the collection opening. These changes may improve performance without replacing the collector.
Is a shop vacuum good enough for a table saw?
It can be useful for portable saws with small ports, but performance varies. Larger stationary saws may need a dedicated dust collector that can provide suitable airflow through the intended connection.
Does a 4-inch hose improve table saw dust collection?
A 4-inch hose can help when the saw and collector are designed to use that diameter. However, connecting a large hose to a small port does not eliminate the port’s restrictions. The entire system must be compatible.
Should I seal every opening in my table saw cabinet?
No. Reducing large, uncontrolled openings may help direct dust toward the collection port, but the cabinet may need incoming air and motor ventilation. Never obstruct cooling vents, moving components, or required maintenance access.
Do I need dust collection above and below the blade?
For better overall capture, collecting dust both below the table and near the upper blade area can help. The best arrangement depends on the saw, compatible safety equipment, and available extraction capacity.
Will a cyclone separator improve dust collection?
A separator can remove larger chips before they reach a vacuum filter or collection bag. It may help with filter maintenance, but it also adds resistance and will not increase the collector’s airflow.
How often should I clean my dust collector filter?
Follow the manufacturer’s maintenance schedule and clean the filter when required by its condition or the equipment’s instructions. If performance drops, inspect the filter along with the hose, port, and other possible restrictions.
Final Thoughts
Improving dust collection on a table saw is usually a matter of fixing several smaller problems rather than buying one expensive accessory.
Start by inspecting the existing port and hose, then address uncontrolled housing gaps, improve lower and upper dust capture, and check whether your collector can provide the airflow your saw needs. Keep the filter clean, minimize unnecessary duct restrictions, and test the results after each change.
Most importantly, preserve the blade guard, riving knife, motor ventilation, and all required safety clearances while making modifications.
With a well-matched collection system and regular maintenance, you can reduce workshop mess, improve cleanup, and limit the amount of dust escaping into the air.
Related reading: Learn how to choose the right dust collection hose, compare dust separators and shop vacs, or plan a dust collection system for a small workshop.